Application Tips
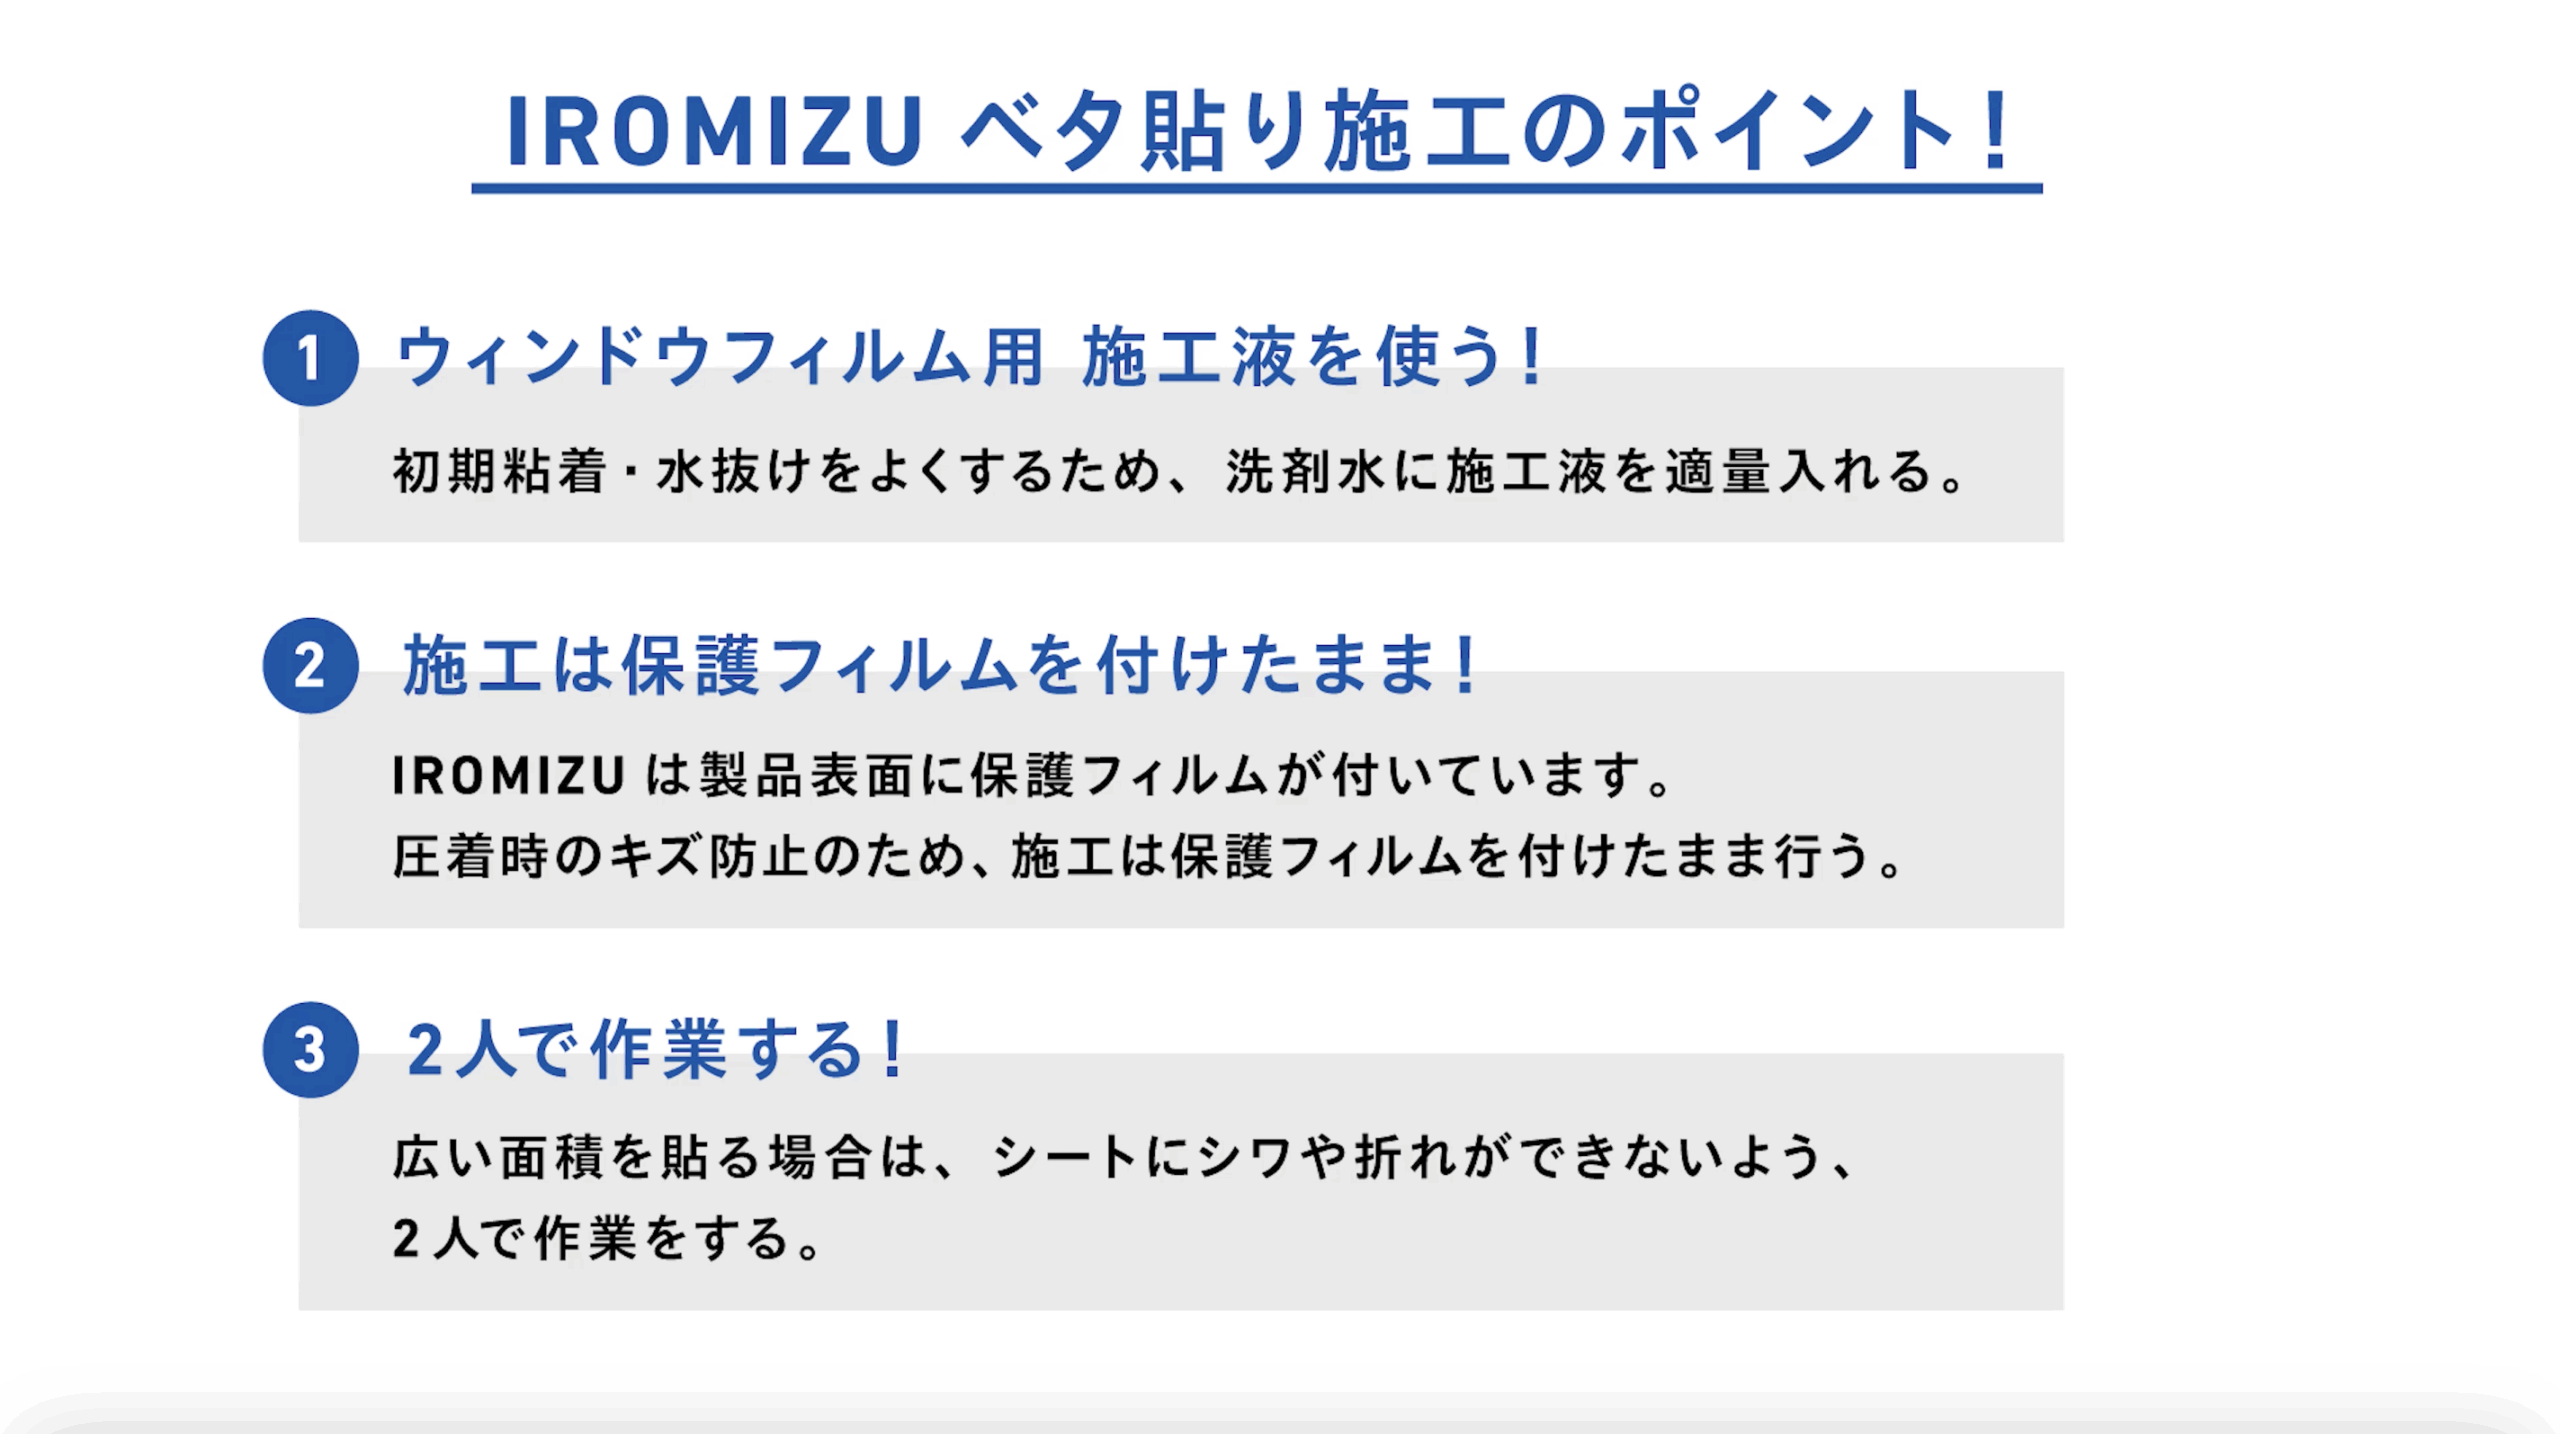
◉ Use installation solution
- Mix the window film application solution into the soapy water.
- This improves initial adhesion and helps water drain away.
◉ Install with the protective film still on
- IROMIZU comes with a protective film on the product surface.
- To prevent scratches during pressing, be sure to install the film with the protective film still in place.
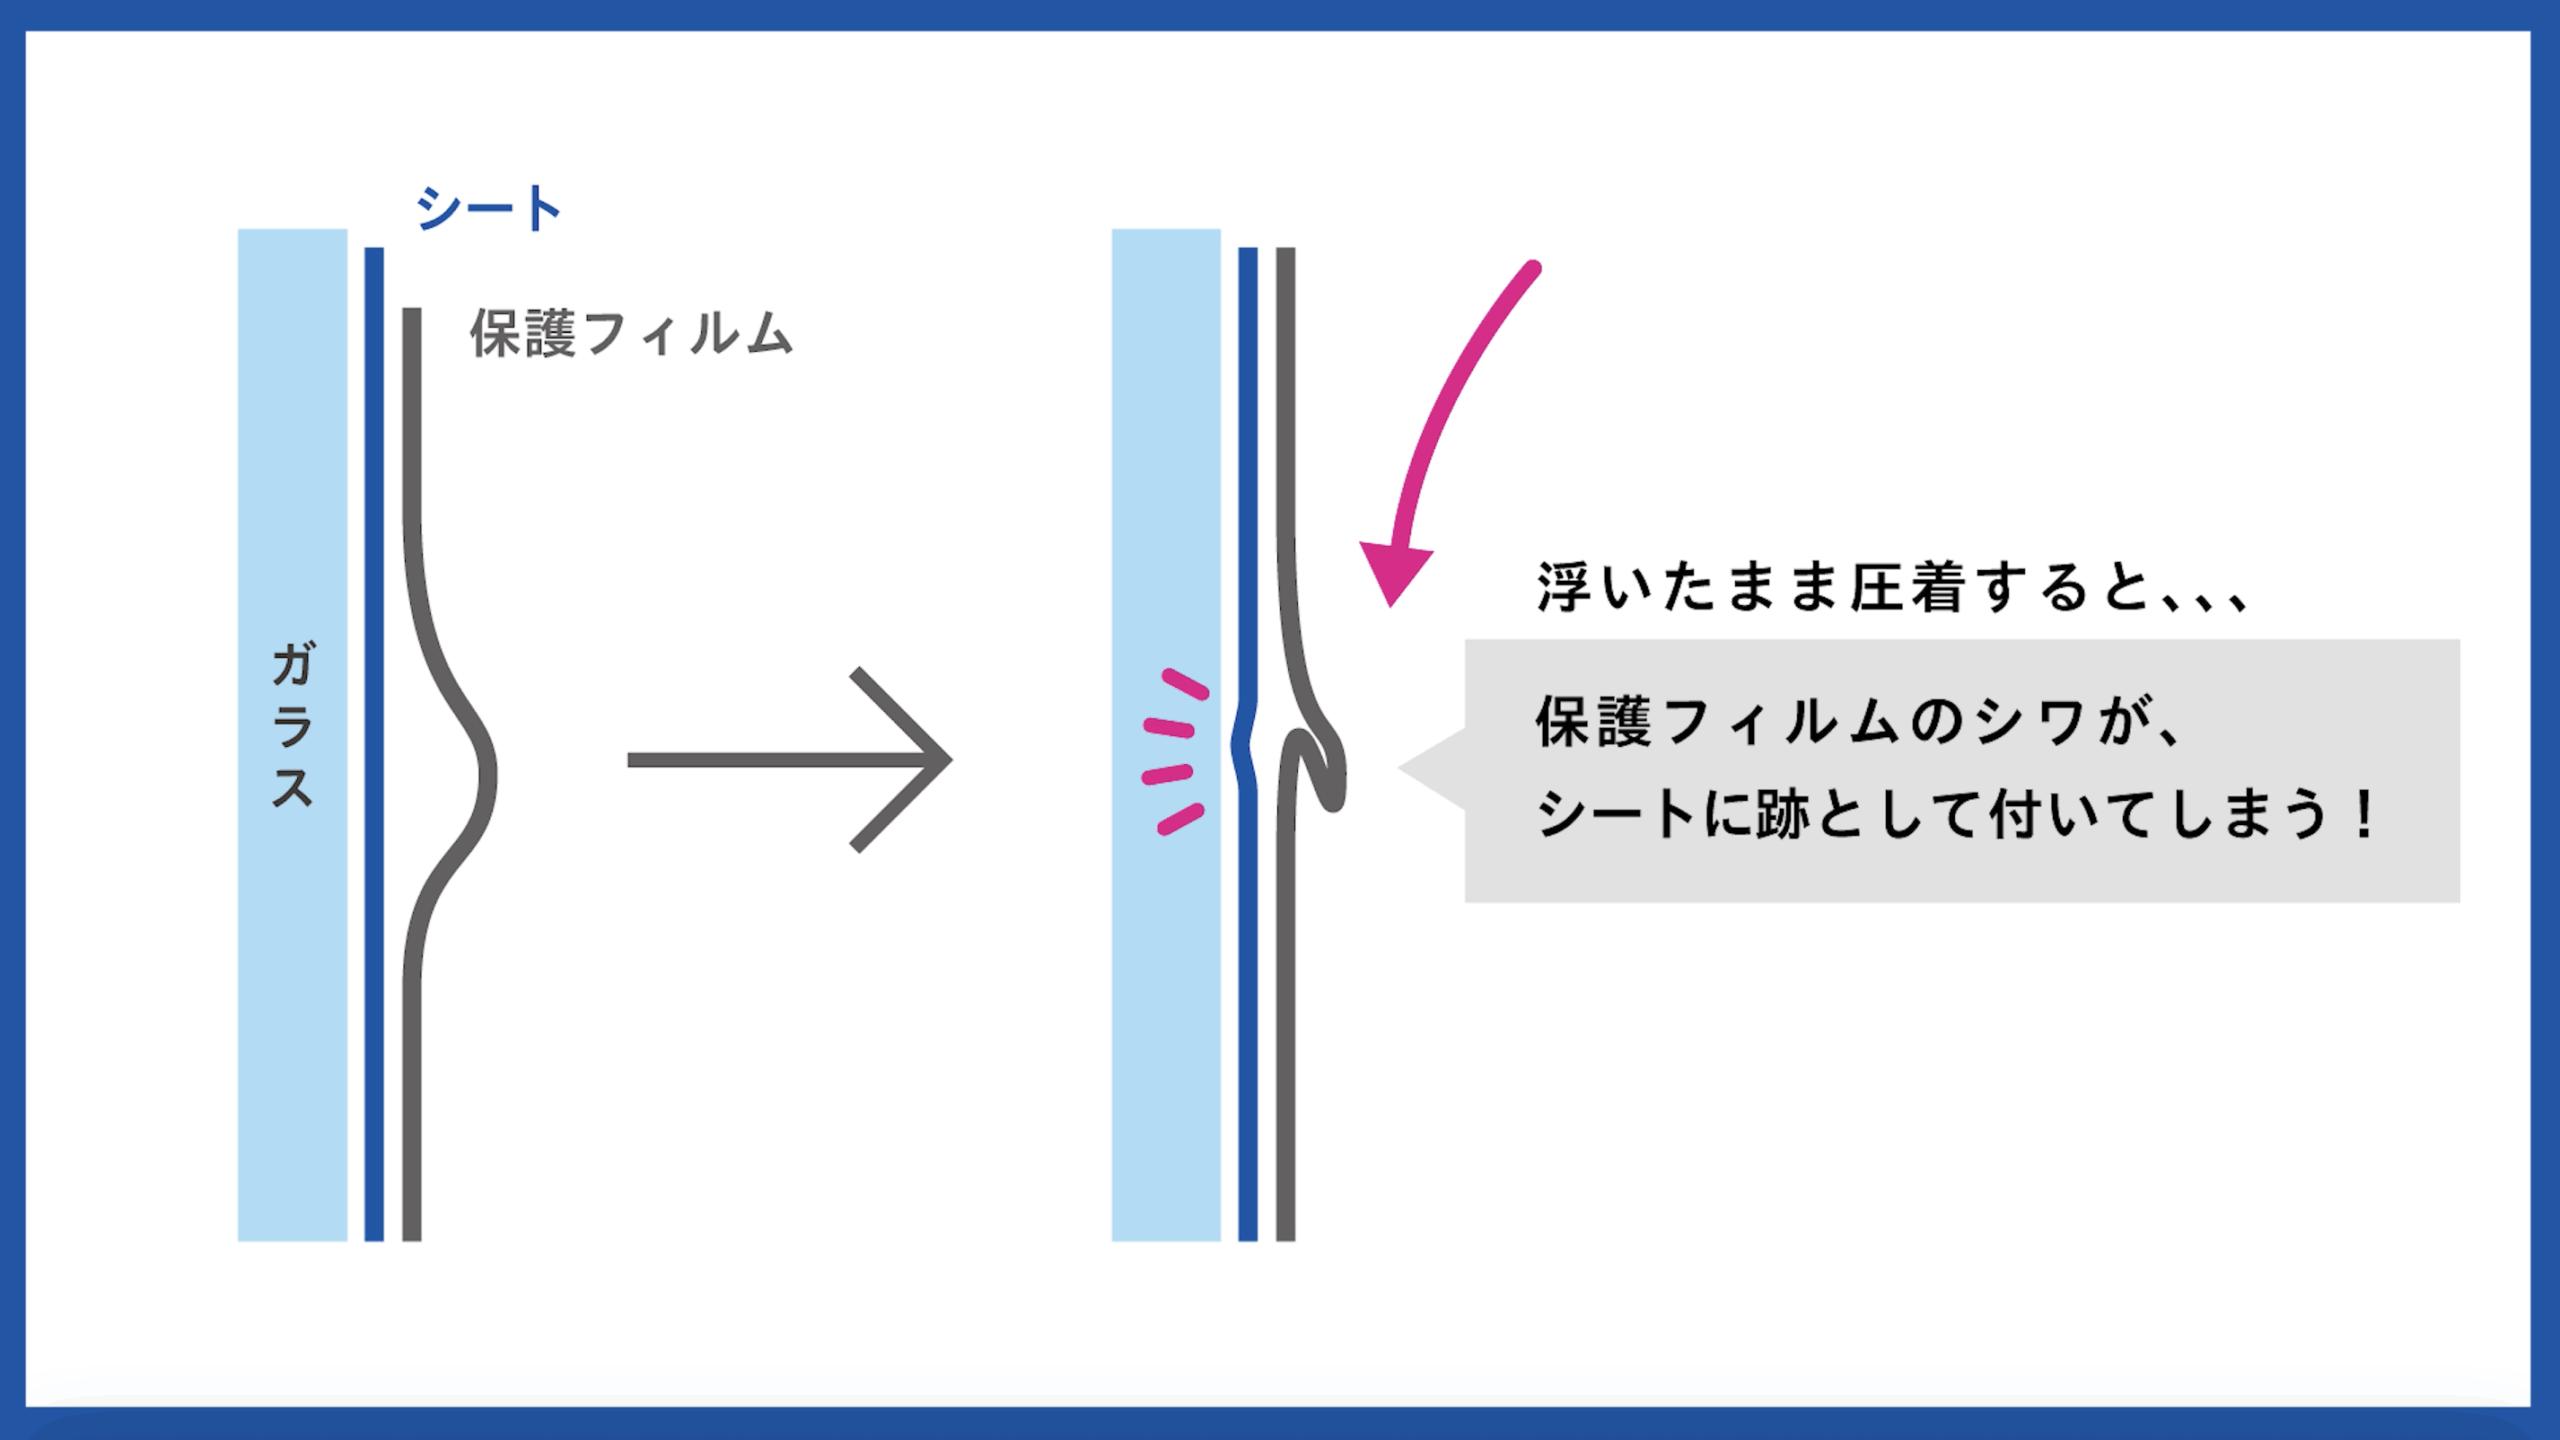
- We’ll explain how to fix it if the protective film lifts during the latter stages.
◉Work with two people
- We recommend working with two people for large areas.
- This helps prevent wrinkles and creases in the sheet.
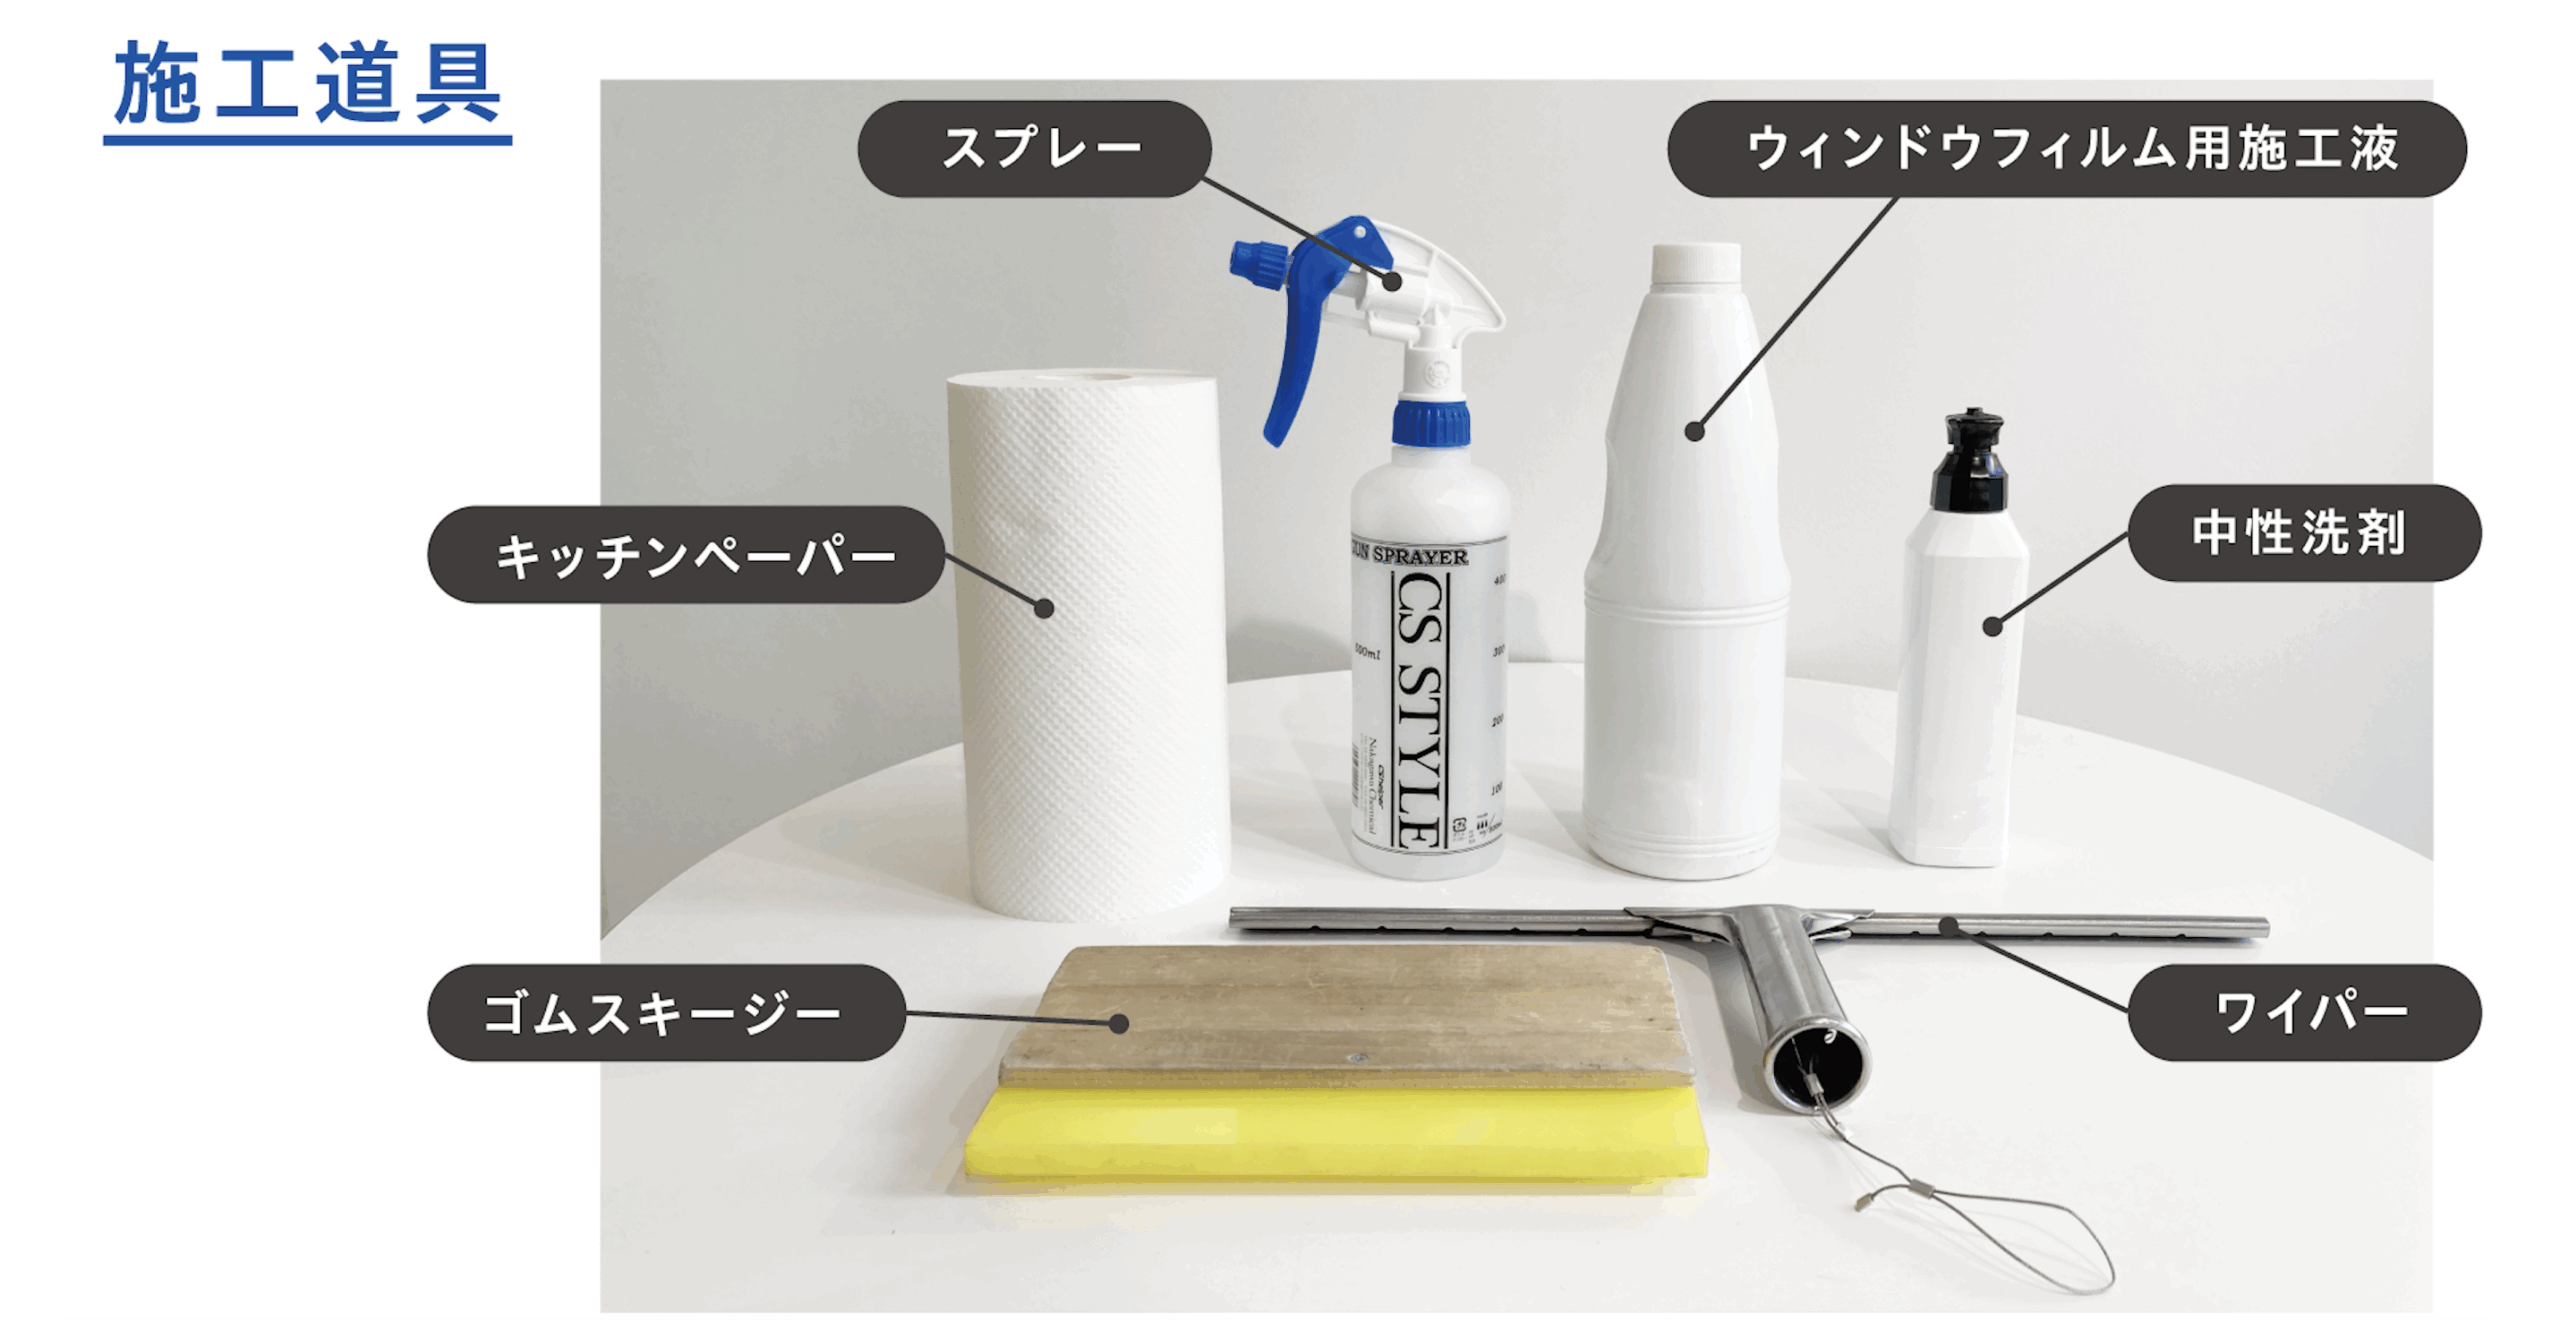
① Tools & Preparation
- In addition to a squeegee and a utility knife, prepare a dedicated application solution.
- Mix an appropriate amount of the application solution into soapy water.
② Cleaning
Clean the glass surface to remove dirt and dust.
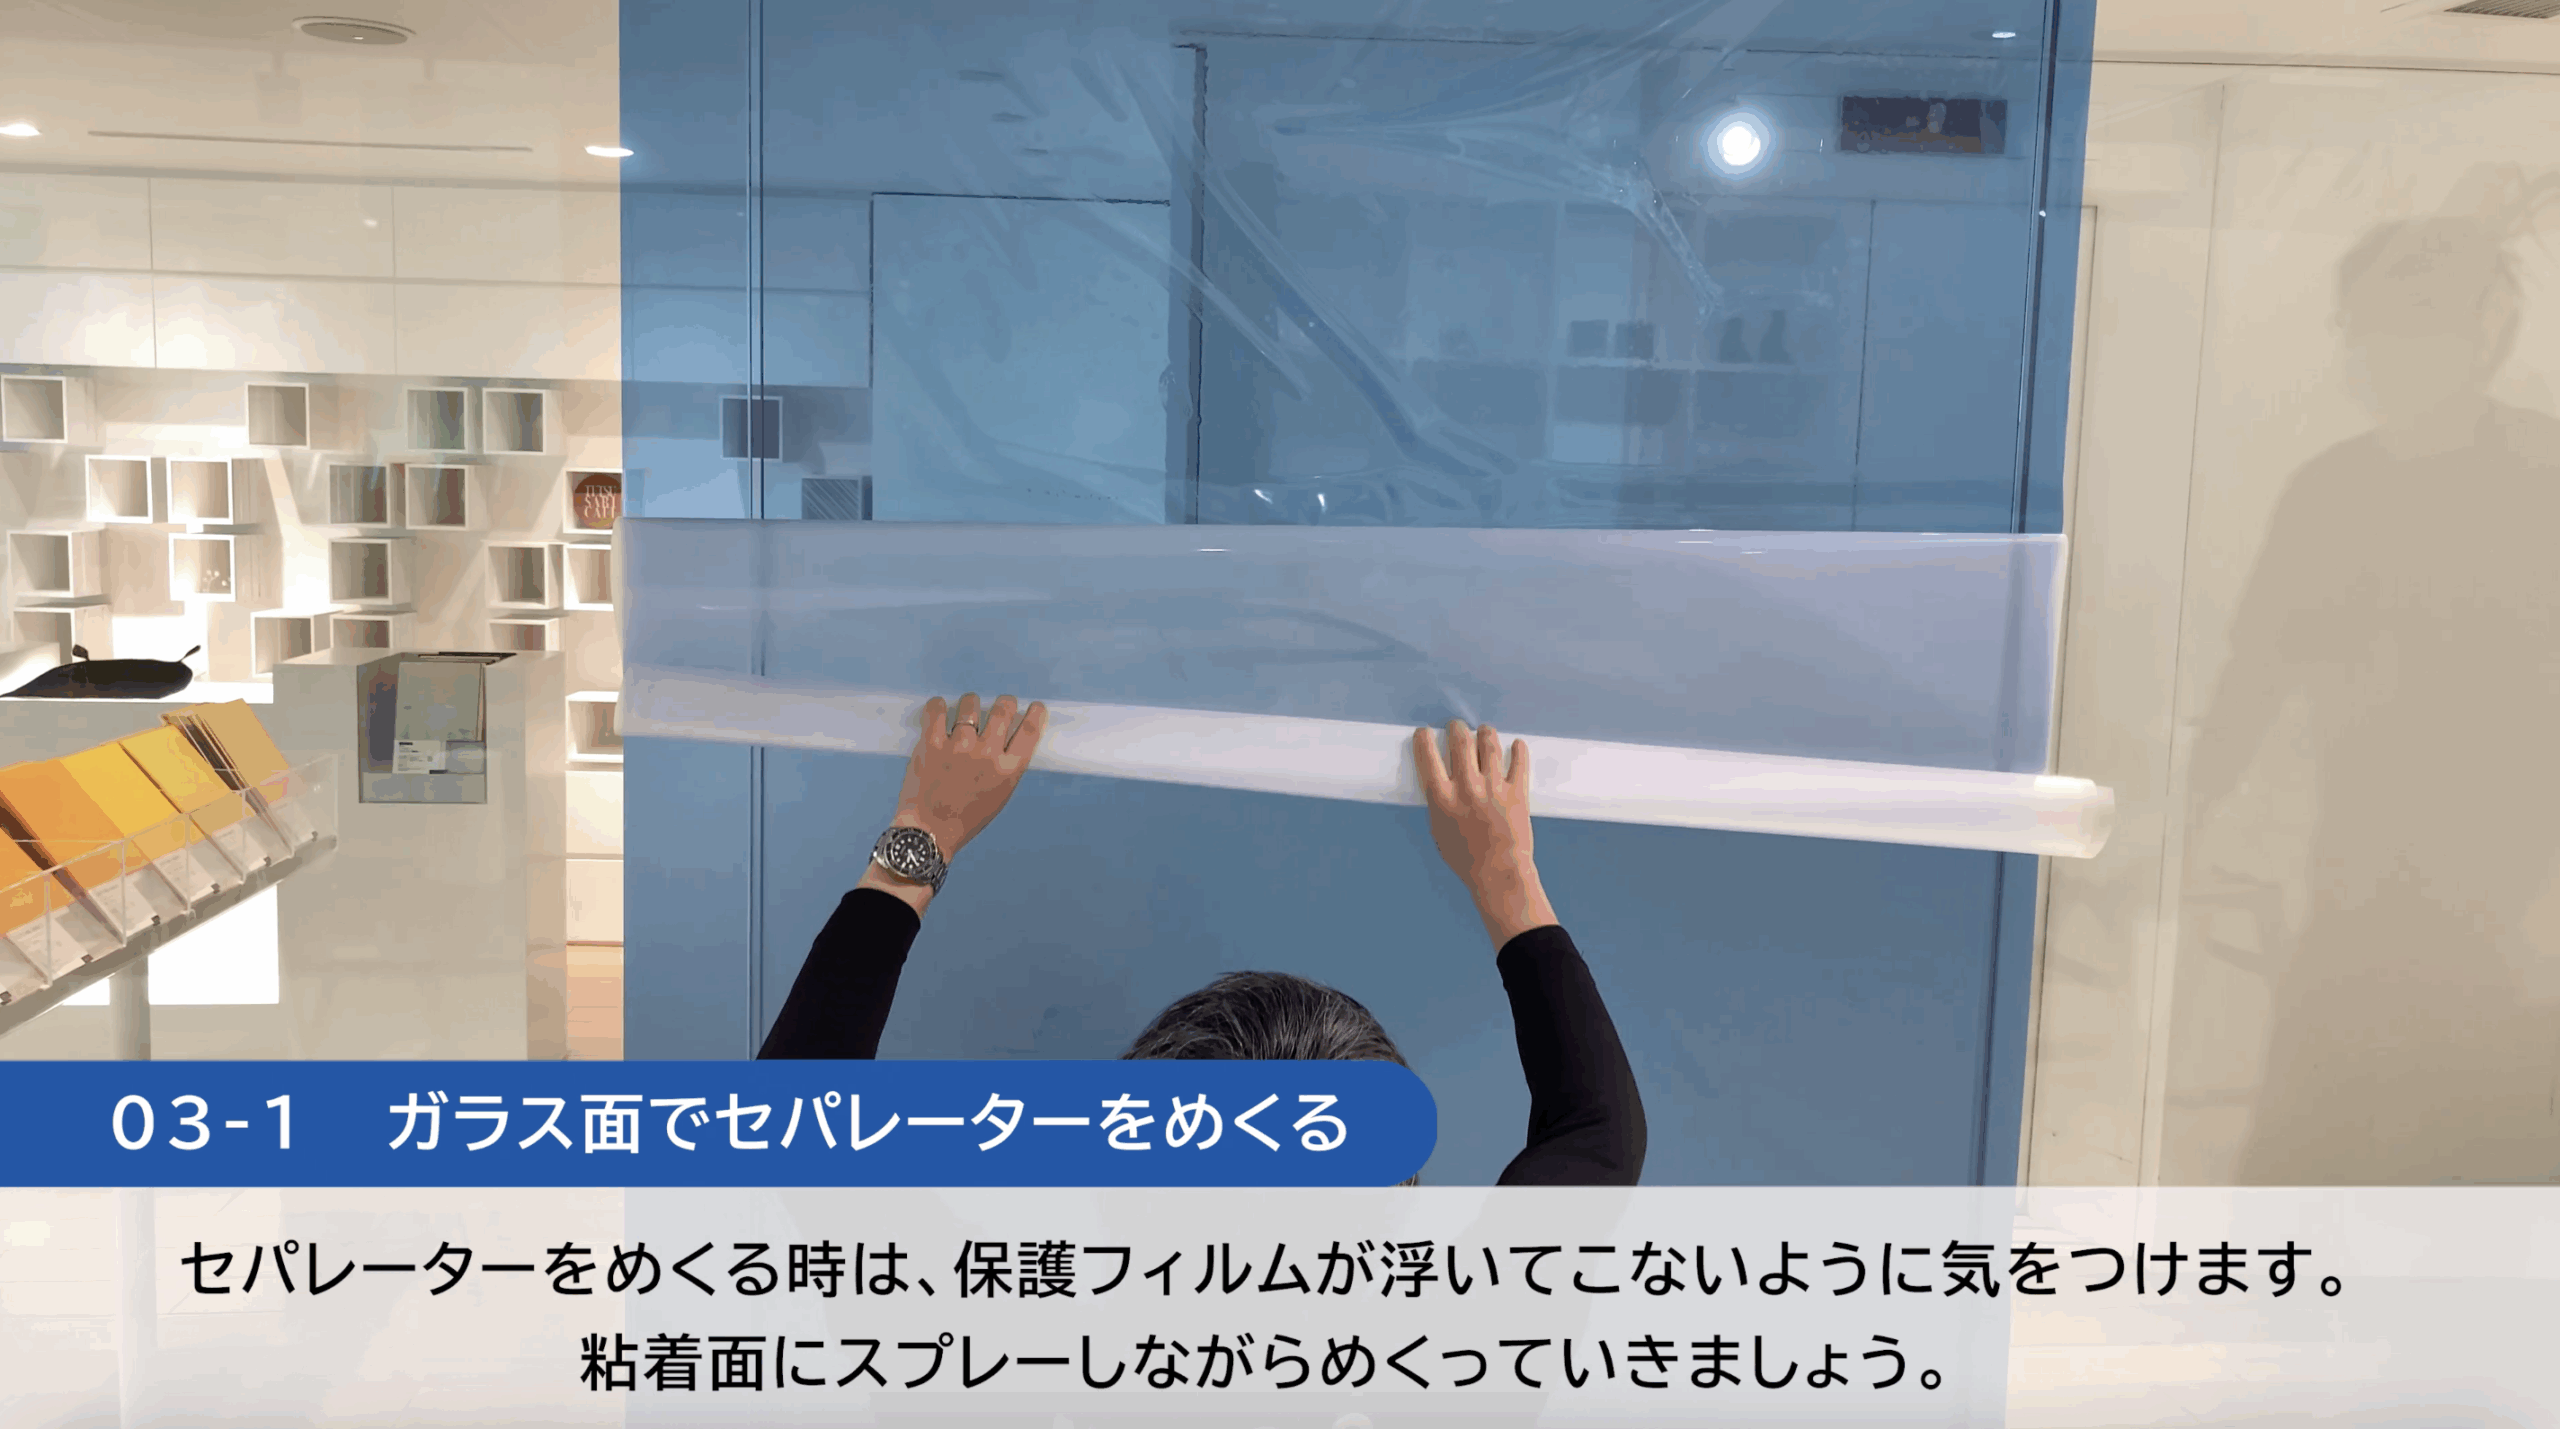
③ How to Peel the Separator
1. When peeling on the glass surface
- Place the protective film face down while it is still attached.
- To prevent static electricity, spray water on your fingers and the separator.
- Peel back the separator while spraying the adhesive side.
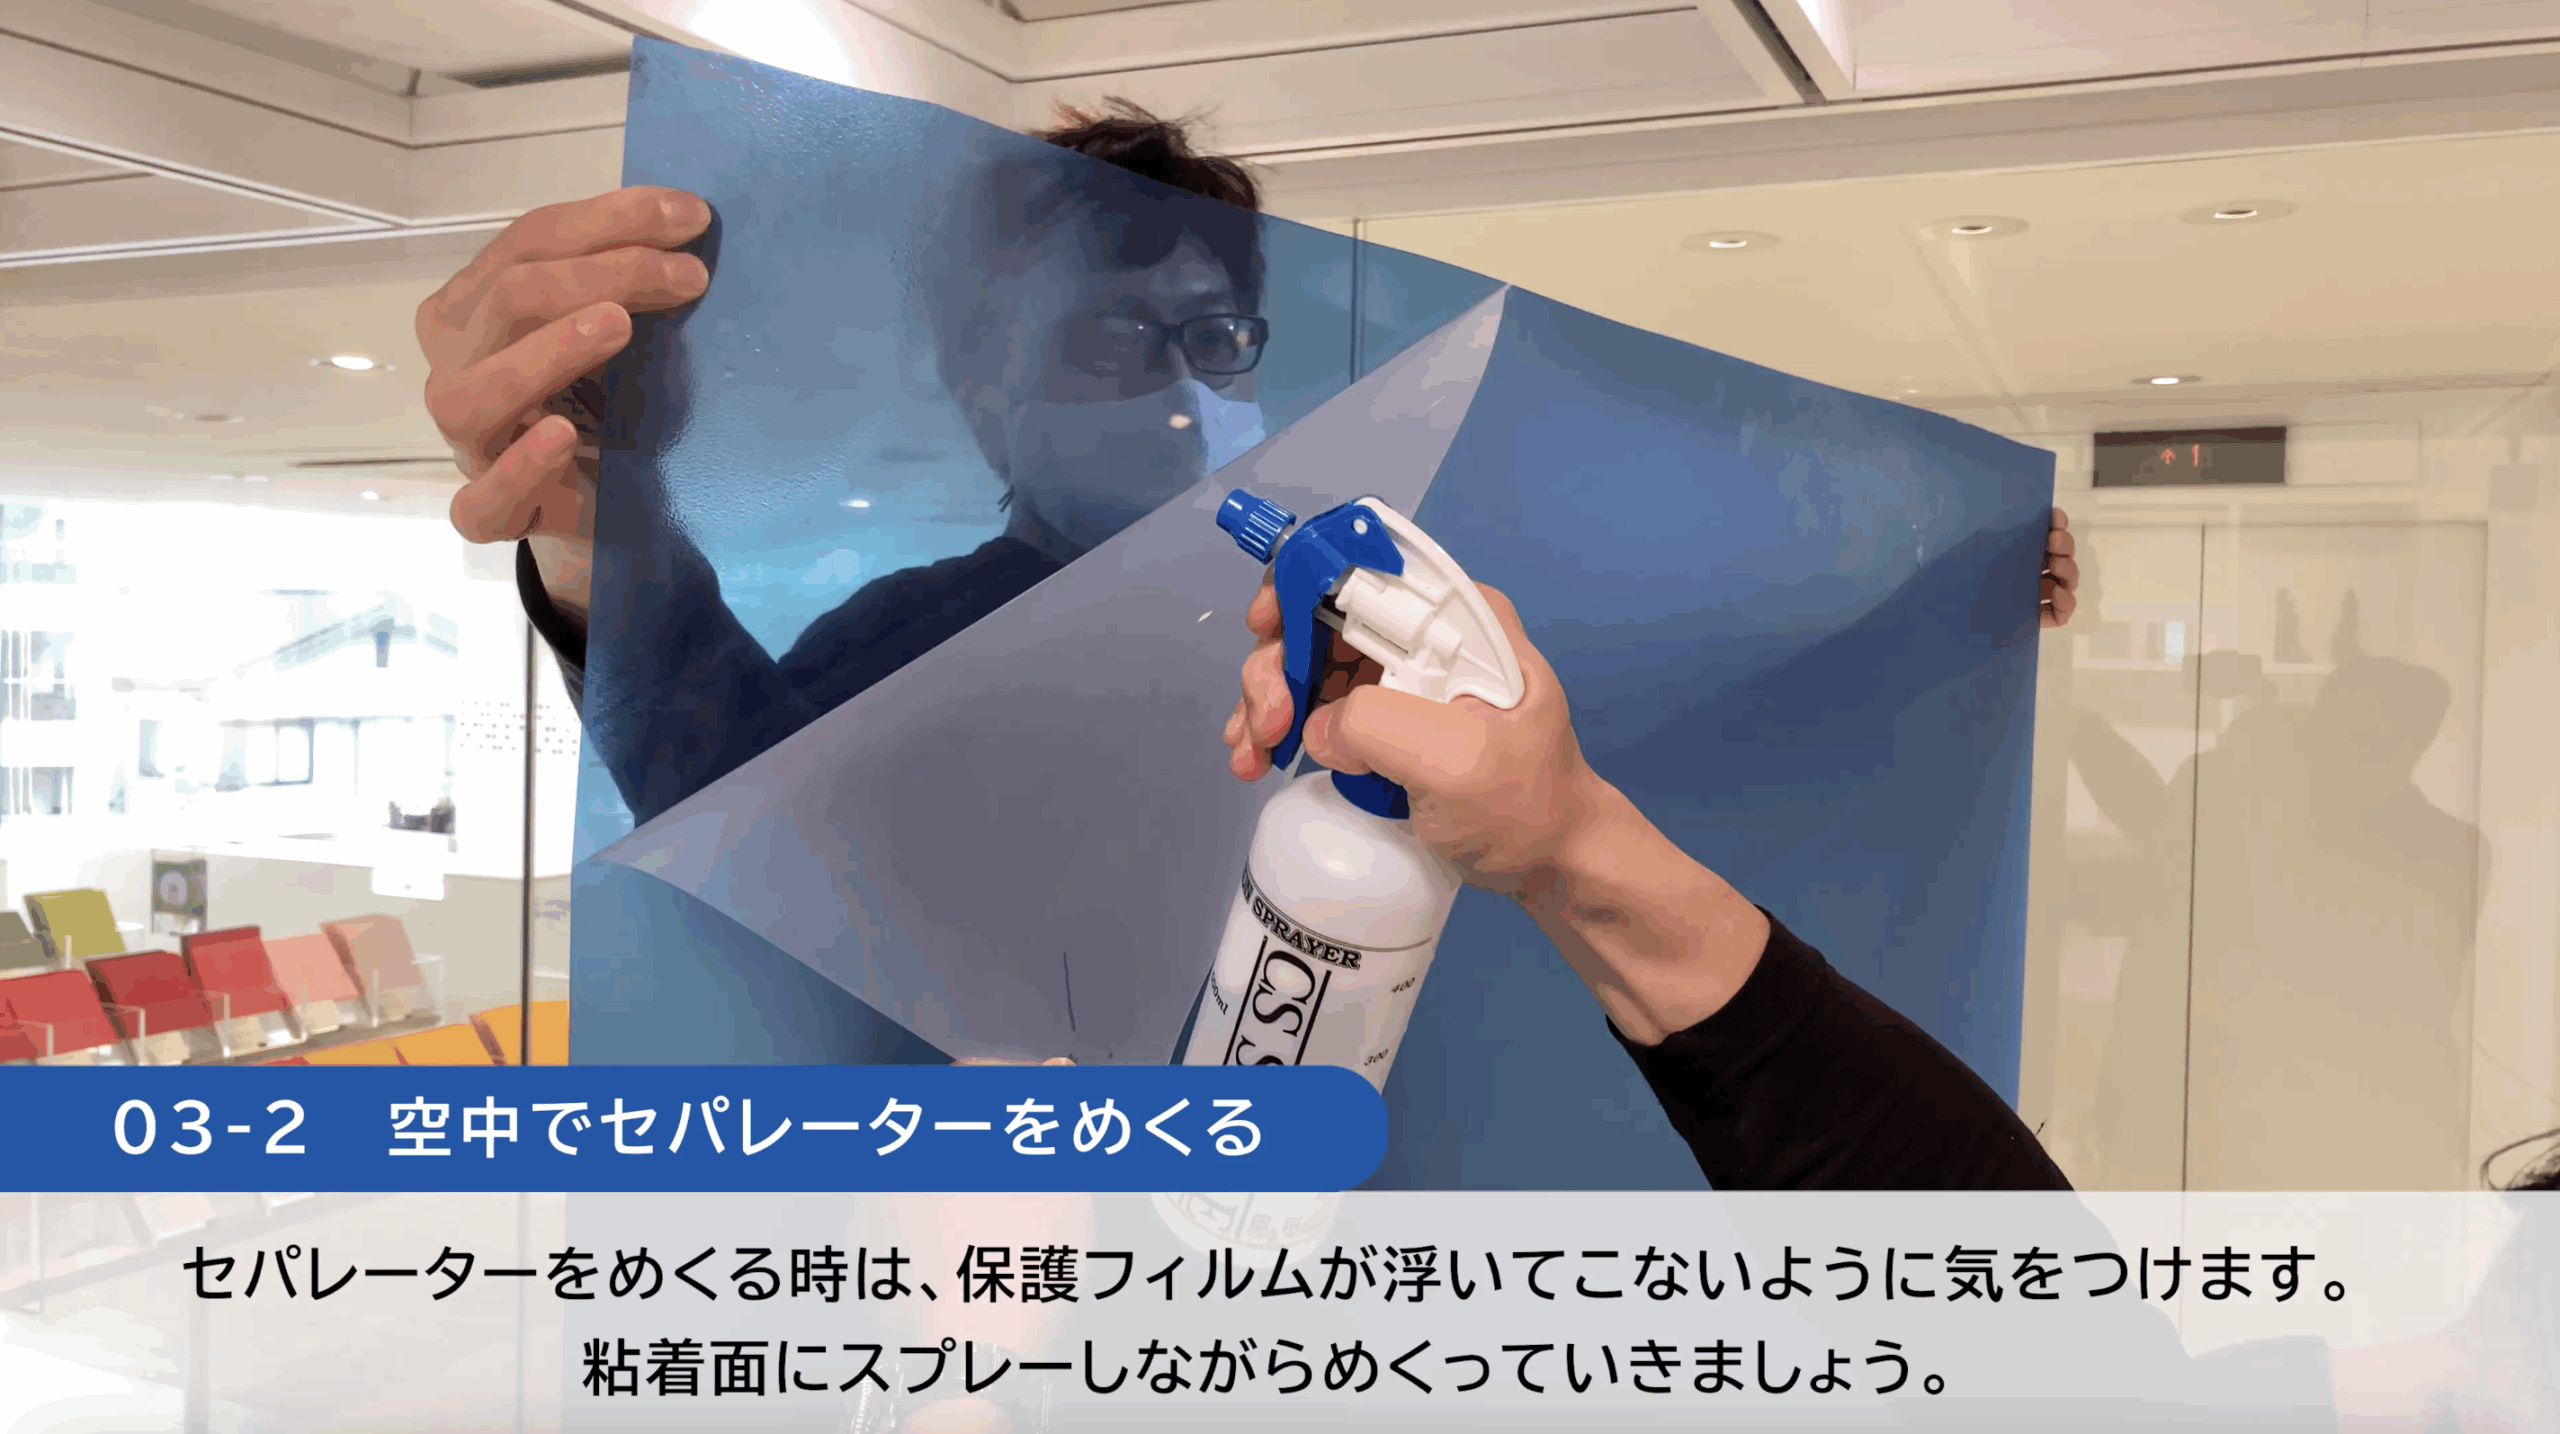
2. Peeling in the Air (When Glass Cannot Be Used)
- One person holds the sheet while another peels back the release liner.
- Be careful not to let the bottom touch the floor.
- Finally, be careful not to let the sheets stick together.
④ Place the sheet
- Spray the adhesive side and the glass surface thoroughly.
- Position the sheet carefully, avoiding wrinkles or creases.
- If the protective film lifts, be sure to correct it before pressing it down.

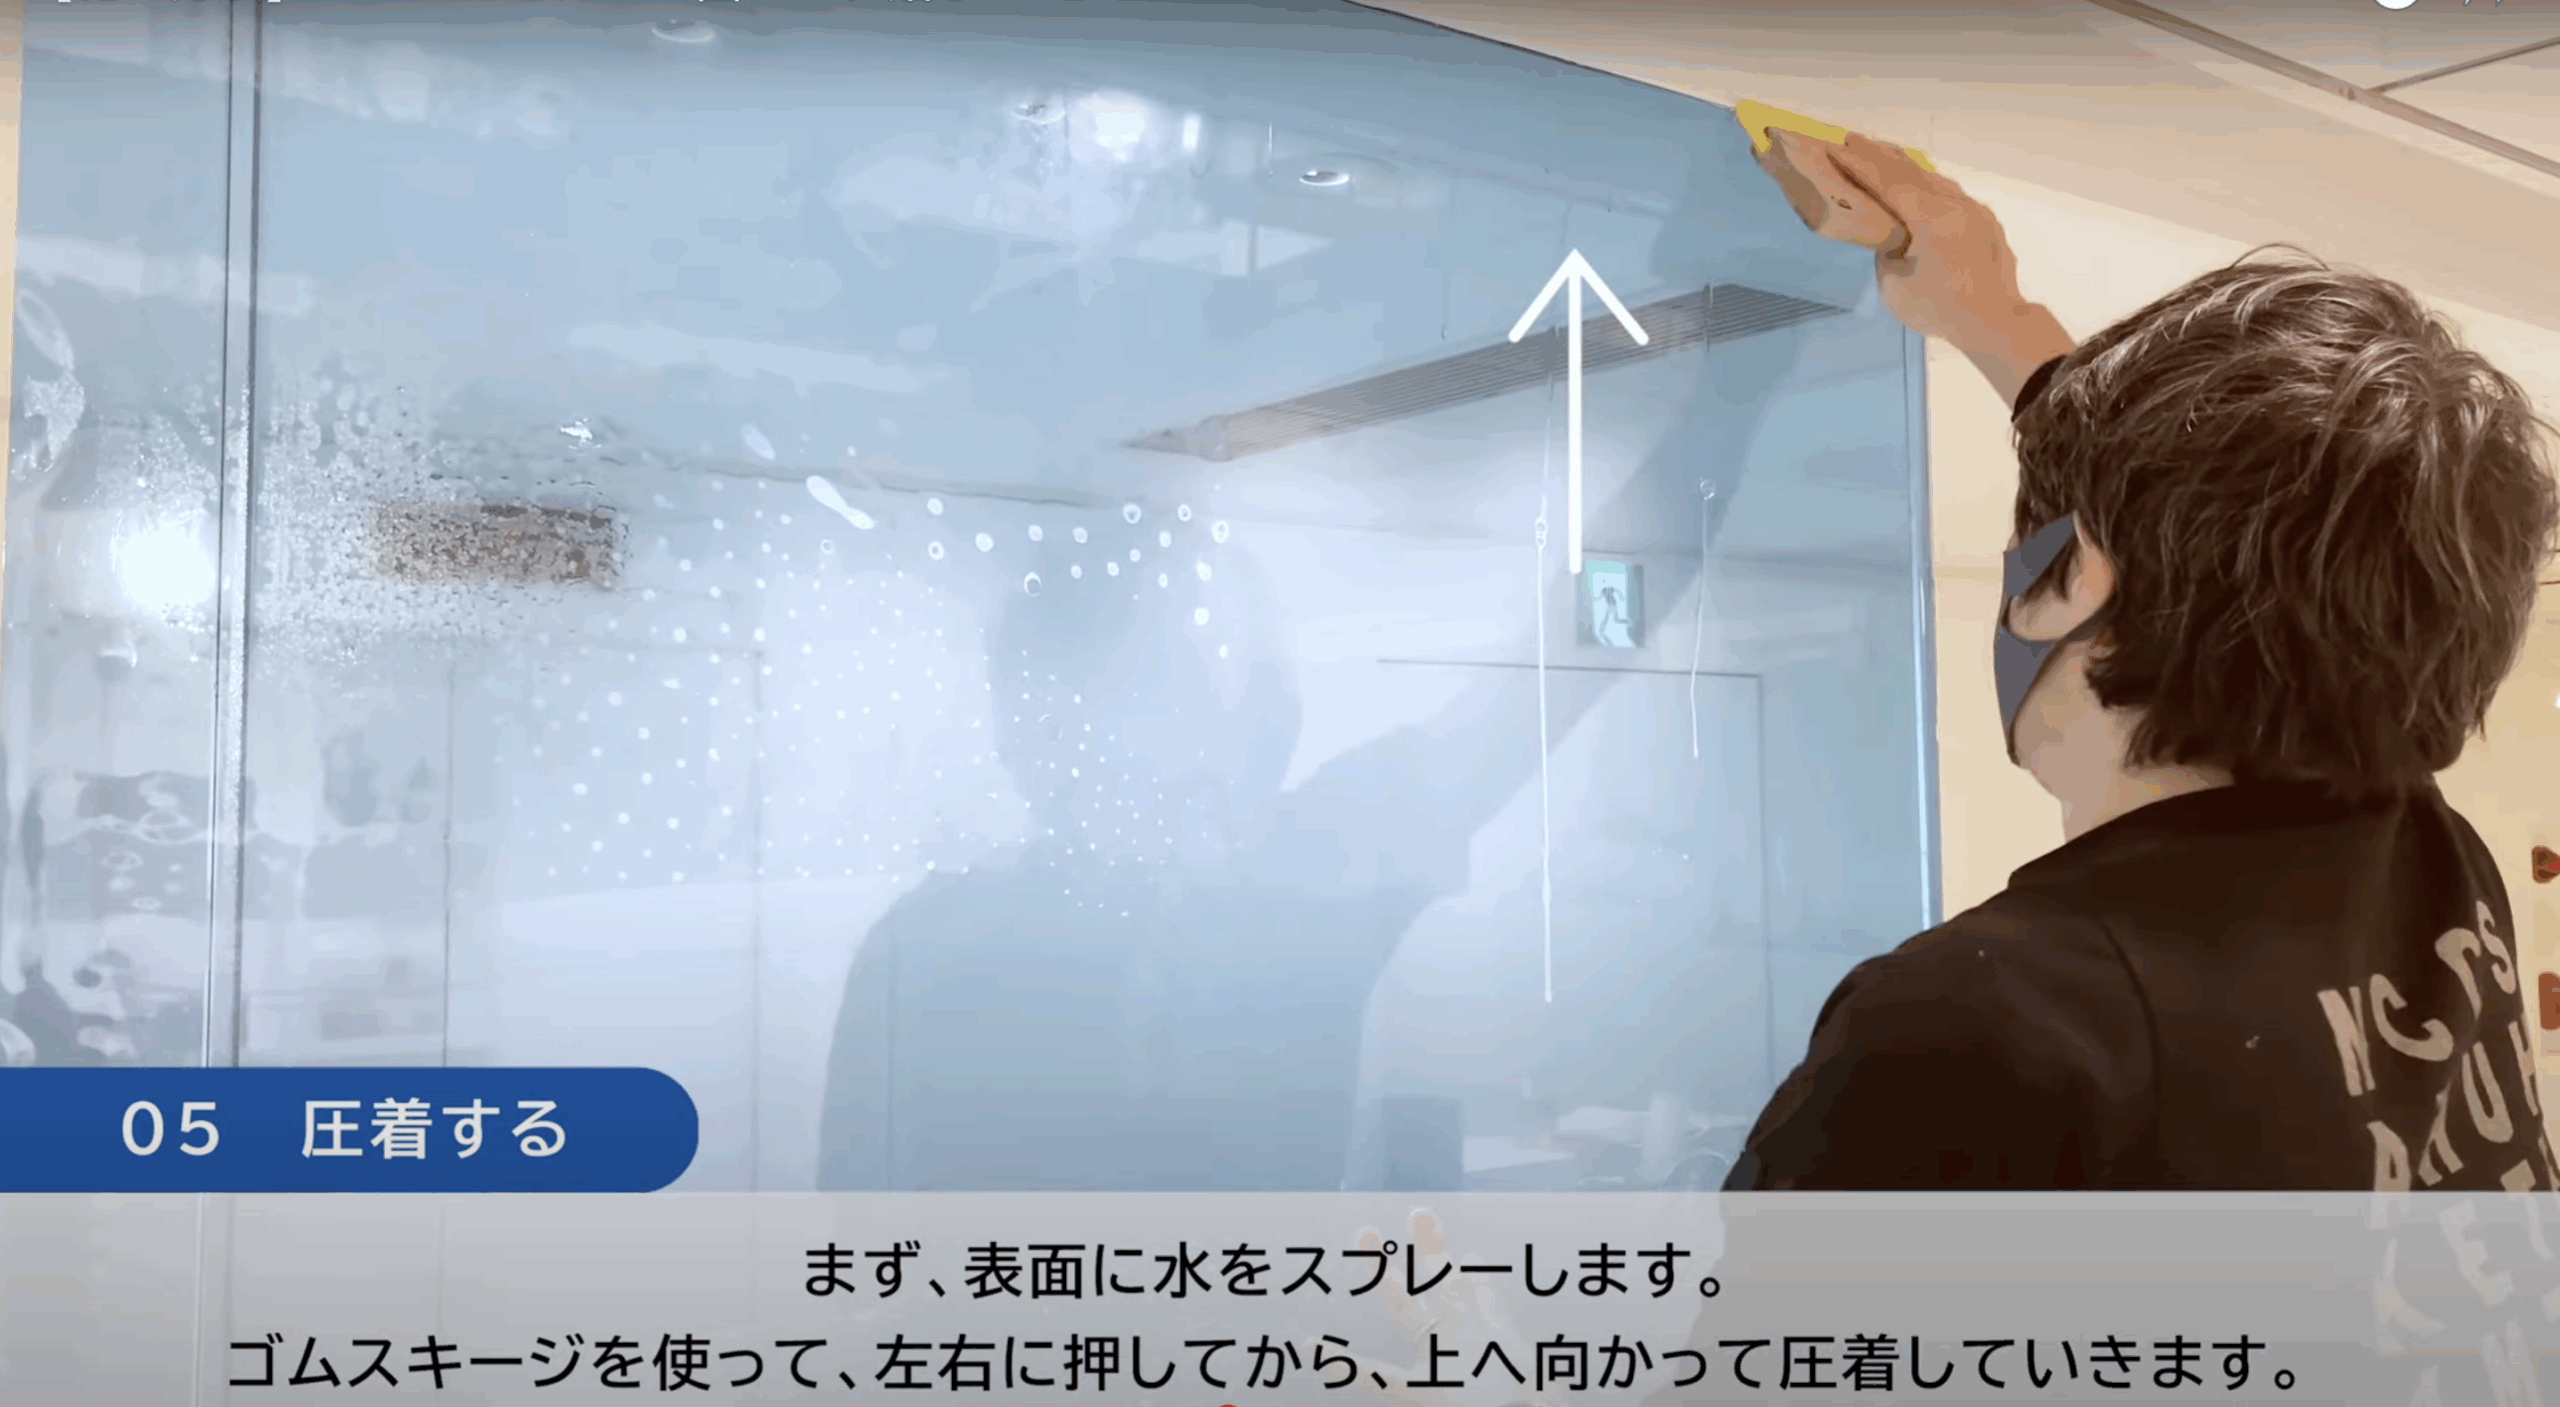
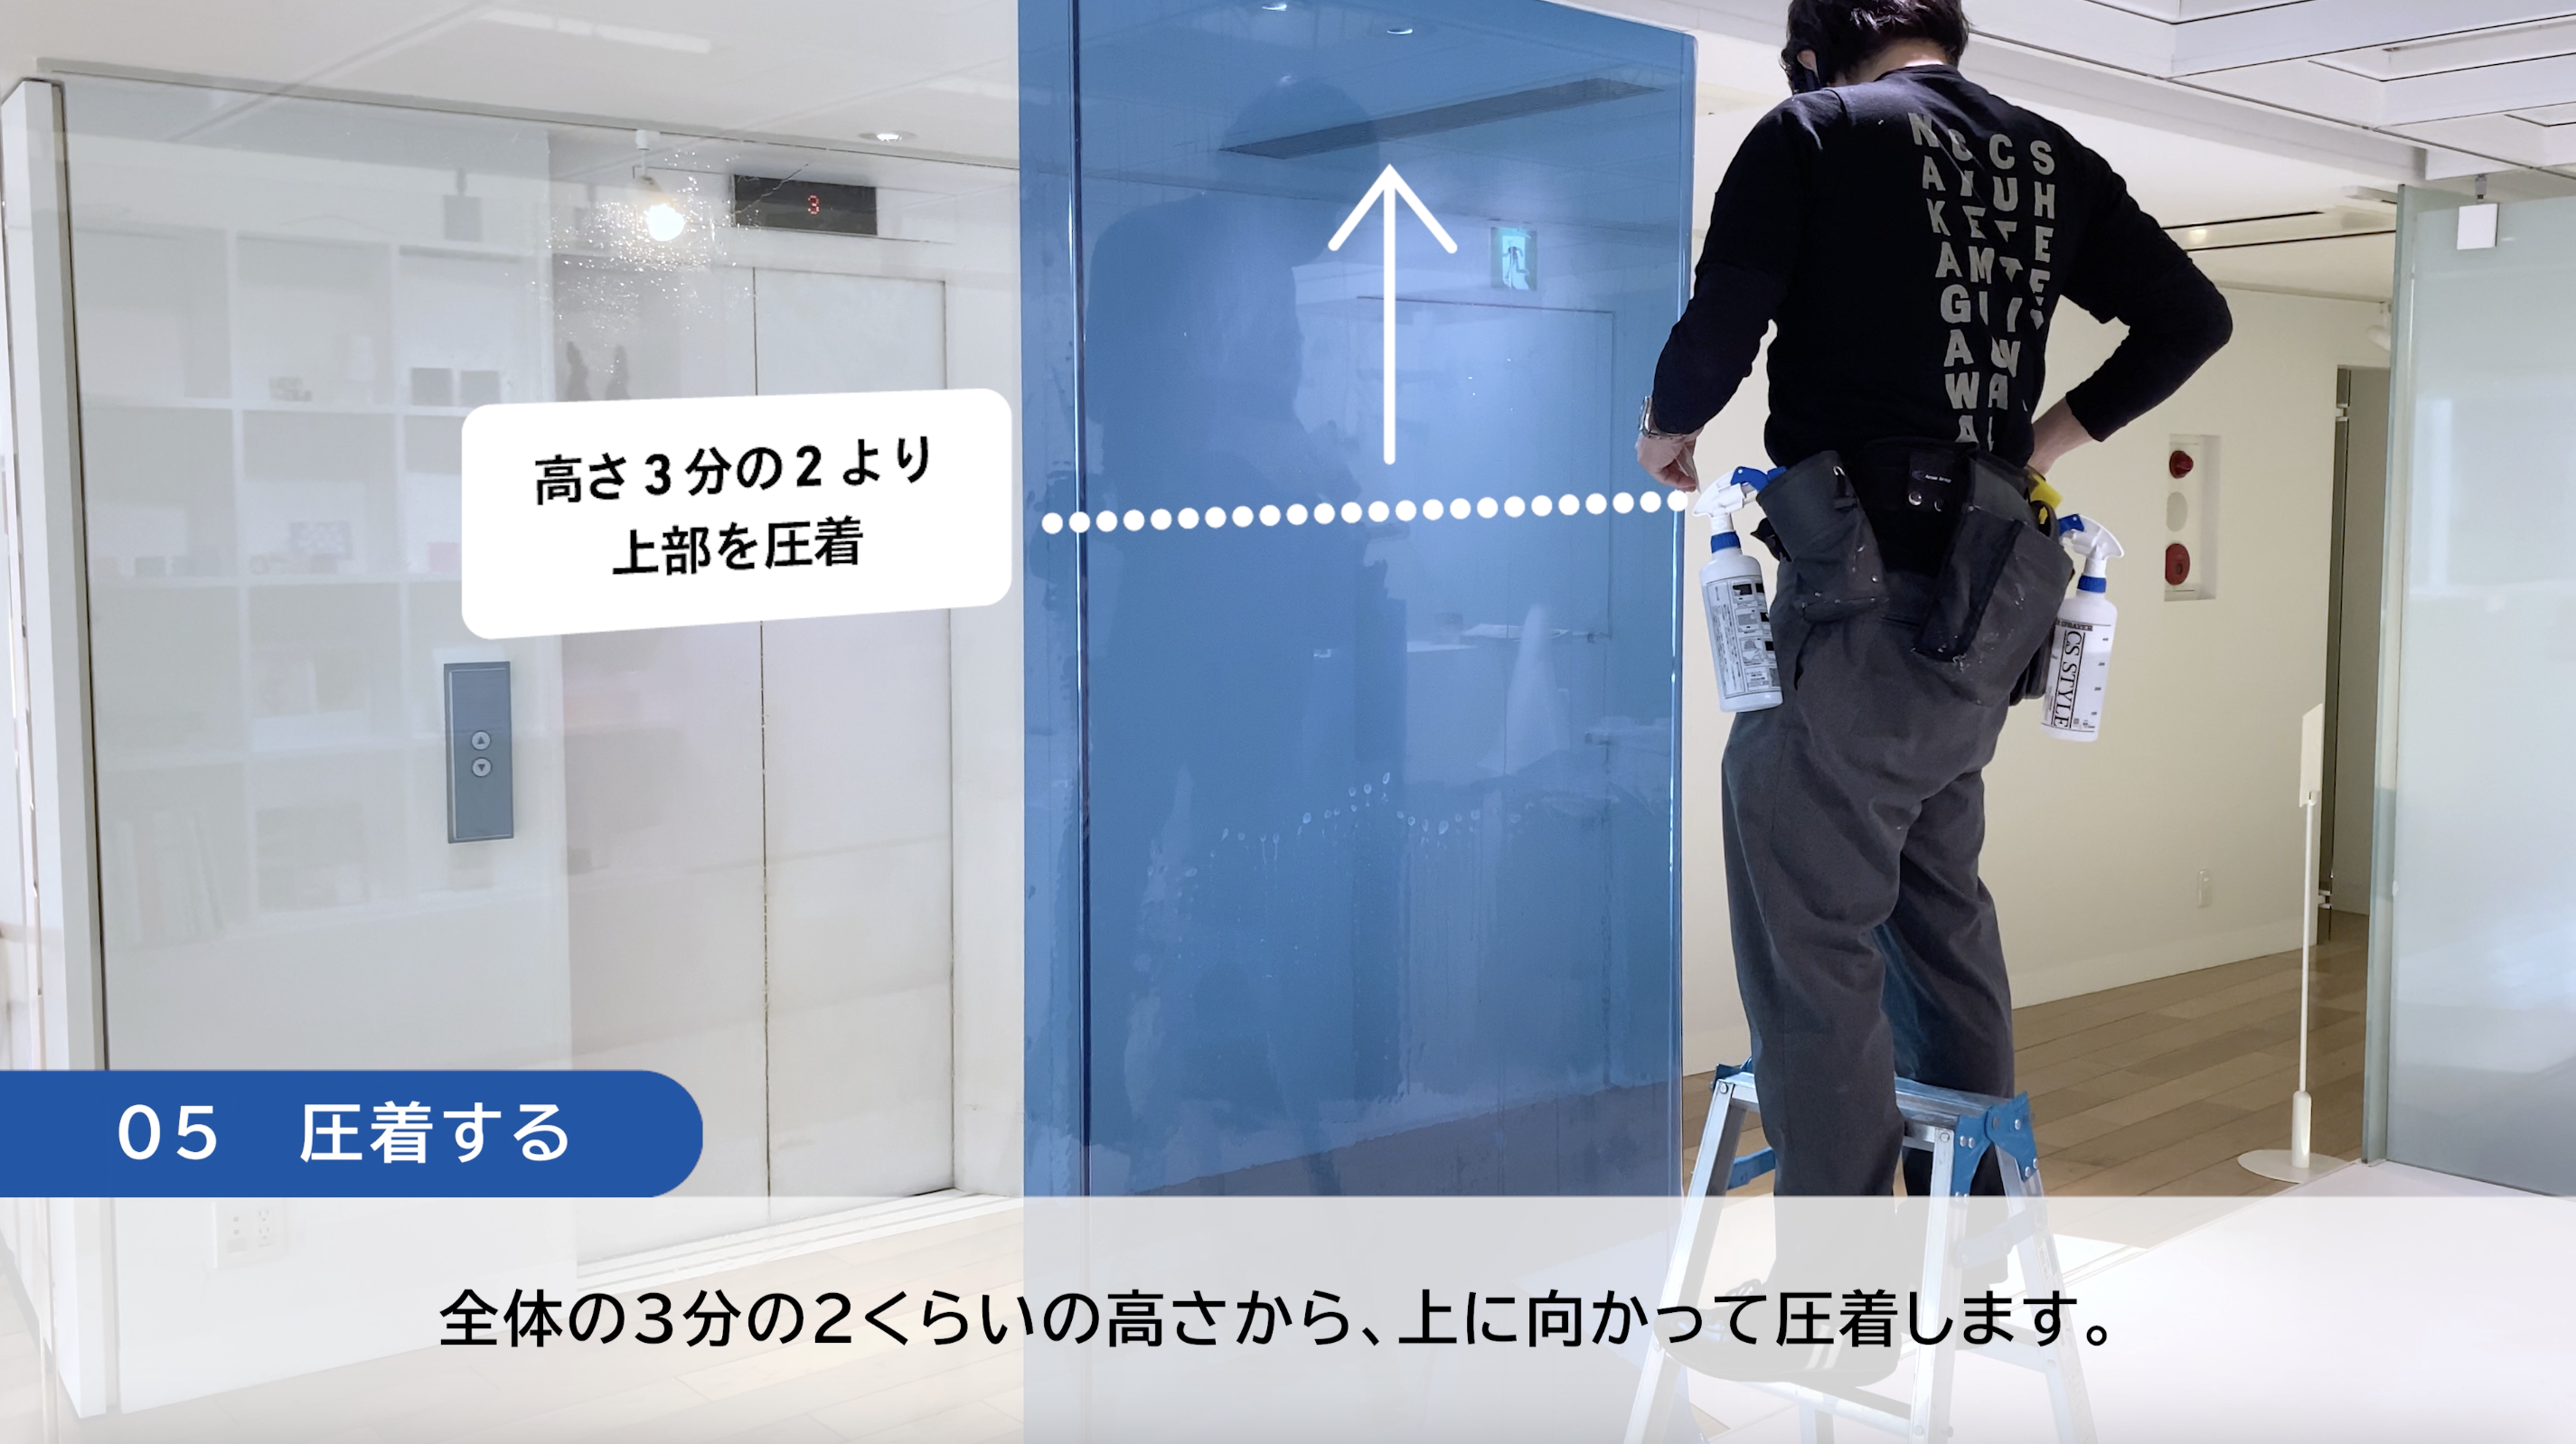
⑤ Pressing
- Start pressing from the top
- starting from about two-thirds of the way up and working toward the top.
- Applying the top section first prevents water from seeping down.
- Use a rubber squeegee to press from side to side, then press upward.
- Spray water on the surface to improve glide.
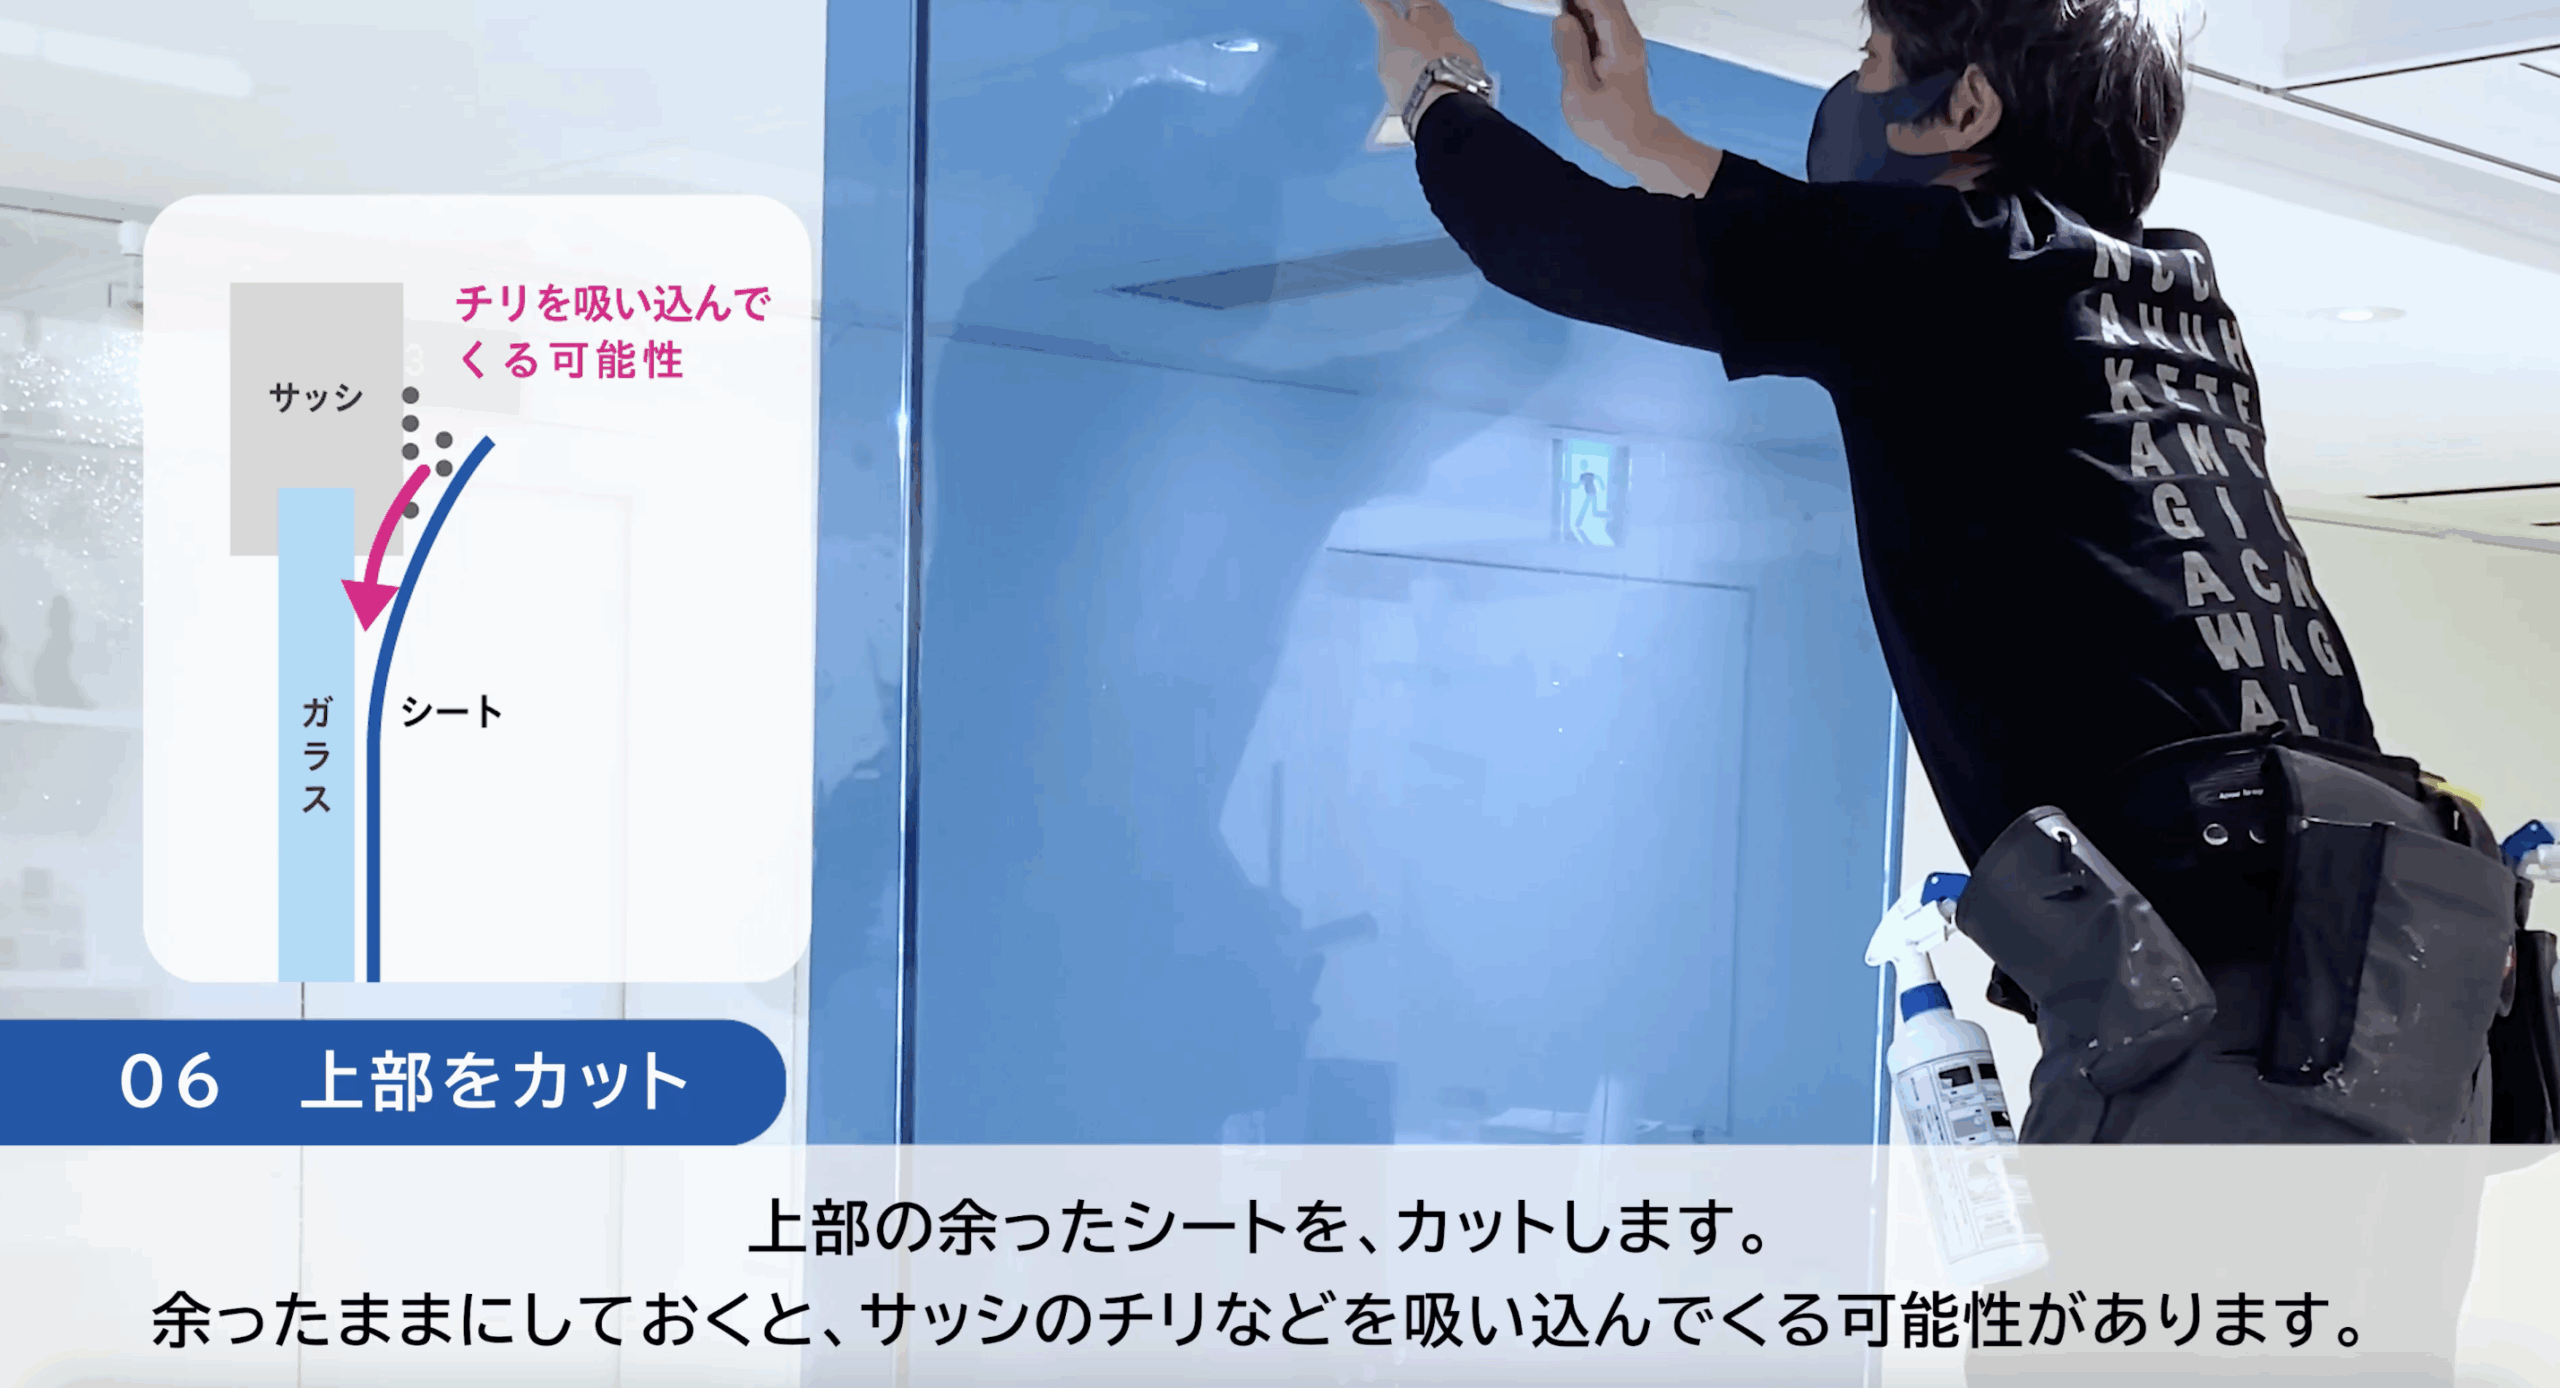
⑥ Cutting
- Top cut: Trim off the excess (to prevent dust from entering the window frame).
- Bottom cut: Leave a 2–3 mm gap to avoid overlapping the caulking.
- Side cuts: Use a presser to hold the material down while cutting with a utility knife to prevent lifting.
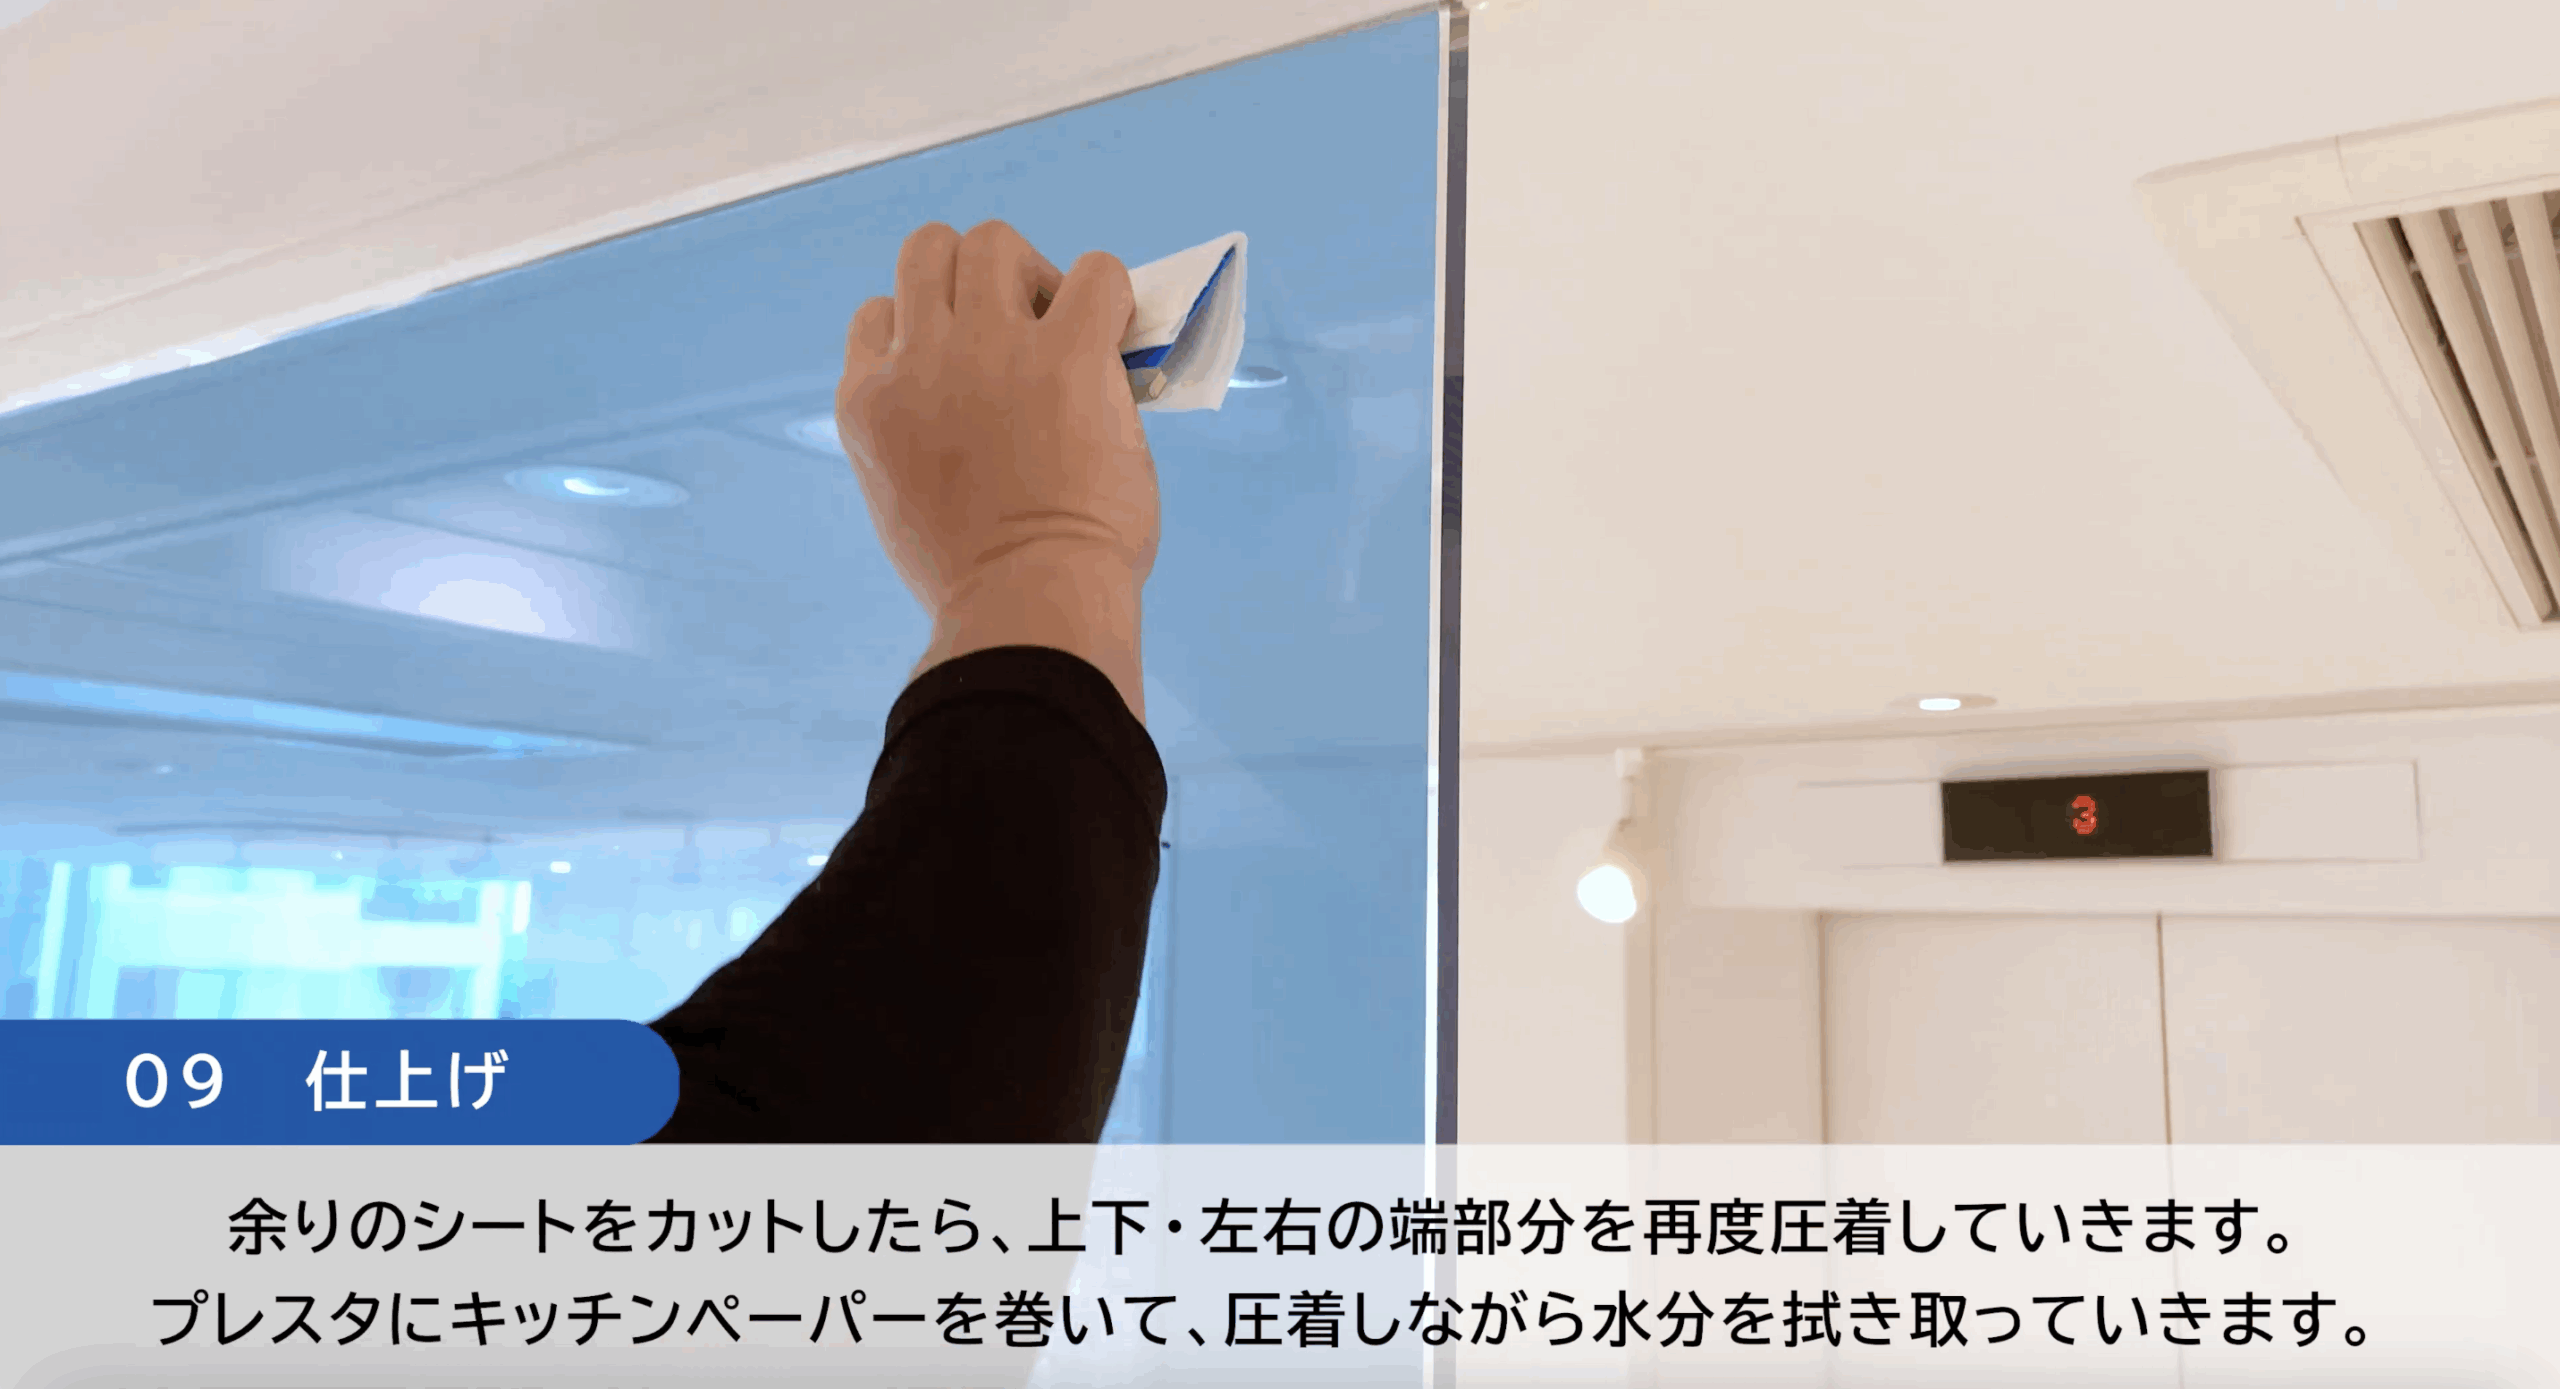
⑦ Finishing
- Re-press the top, bottom, left, and right edges.
- Wrap the pressure tool with paper towels and press while wiping away moisture.
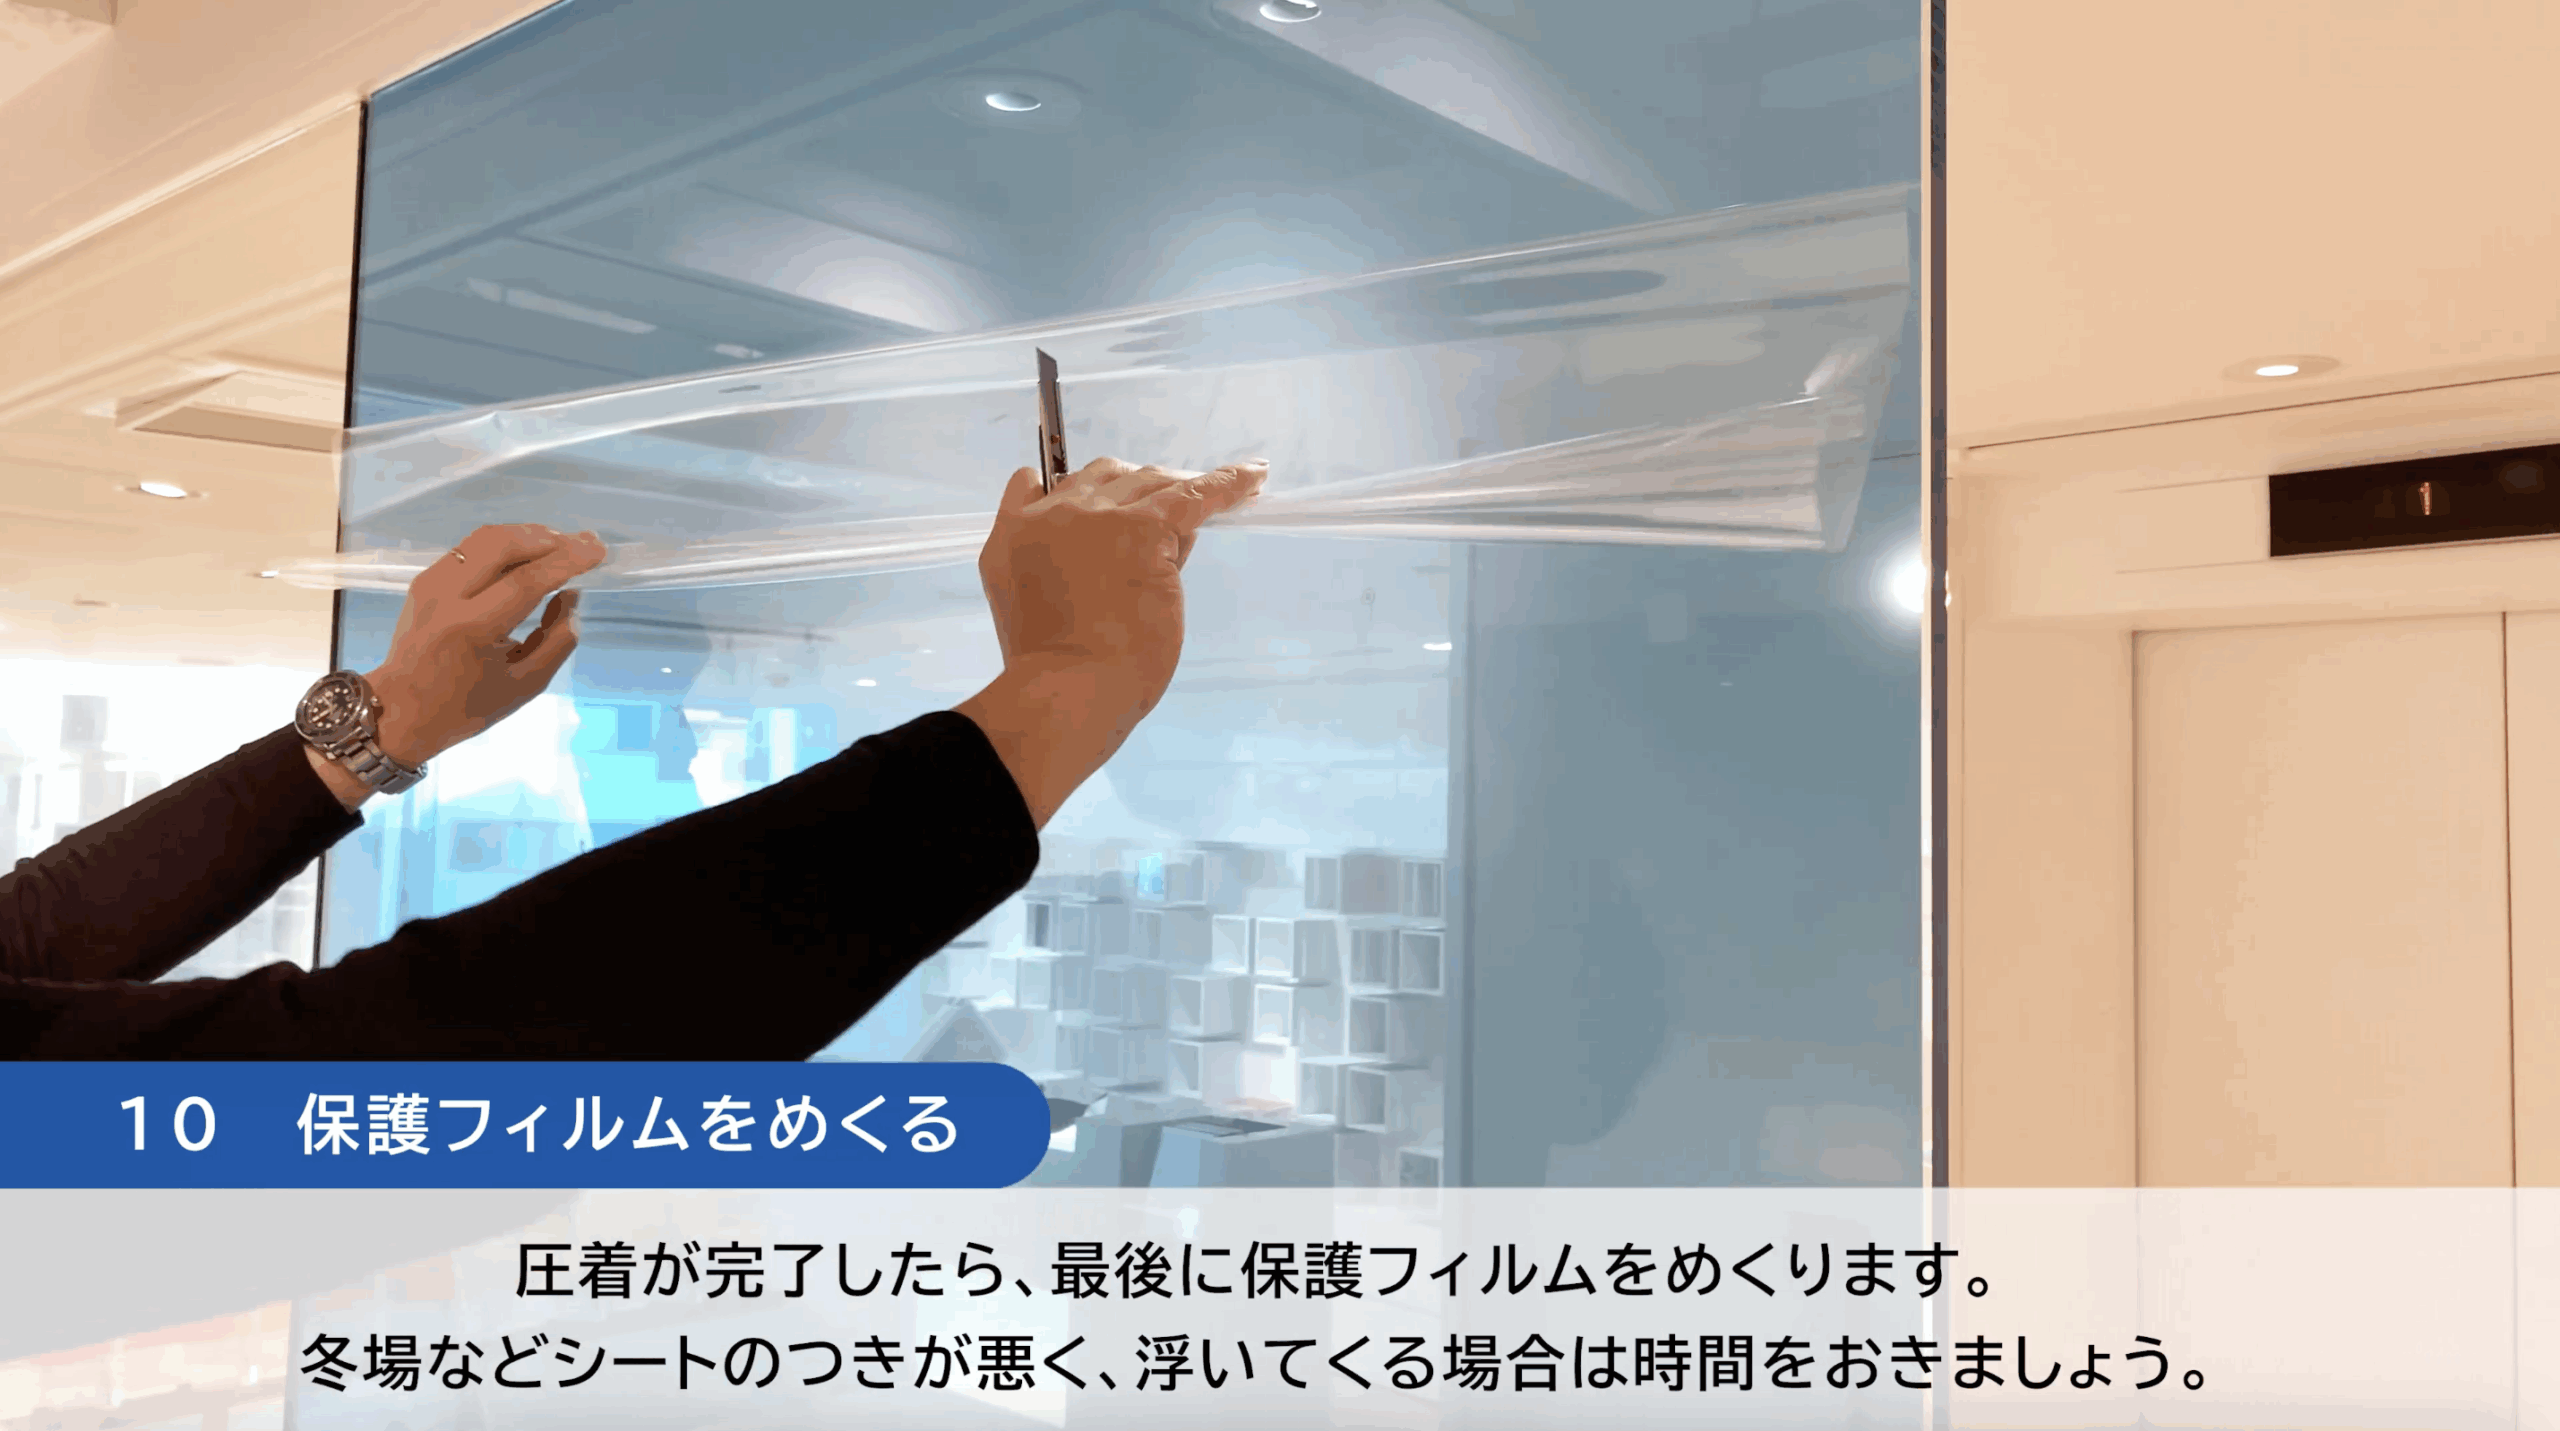
⑧ Peel off the protective film
- Once the pressing is complete, peel off the protective film.
- In winter, adhesion may be poor, so allow some time to pass.
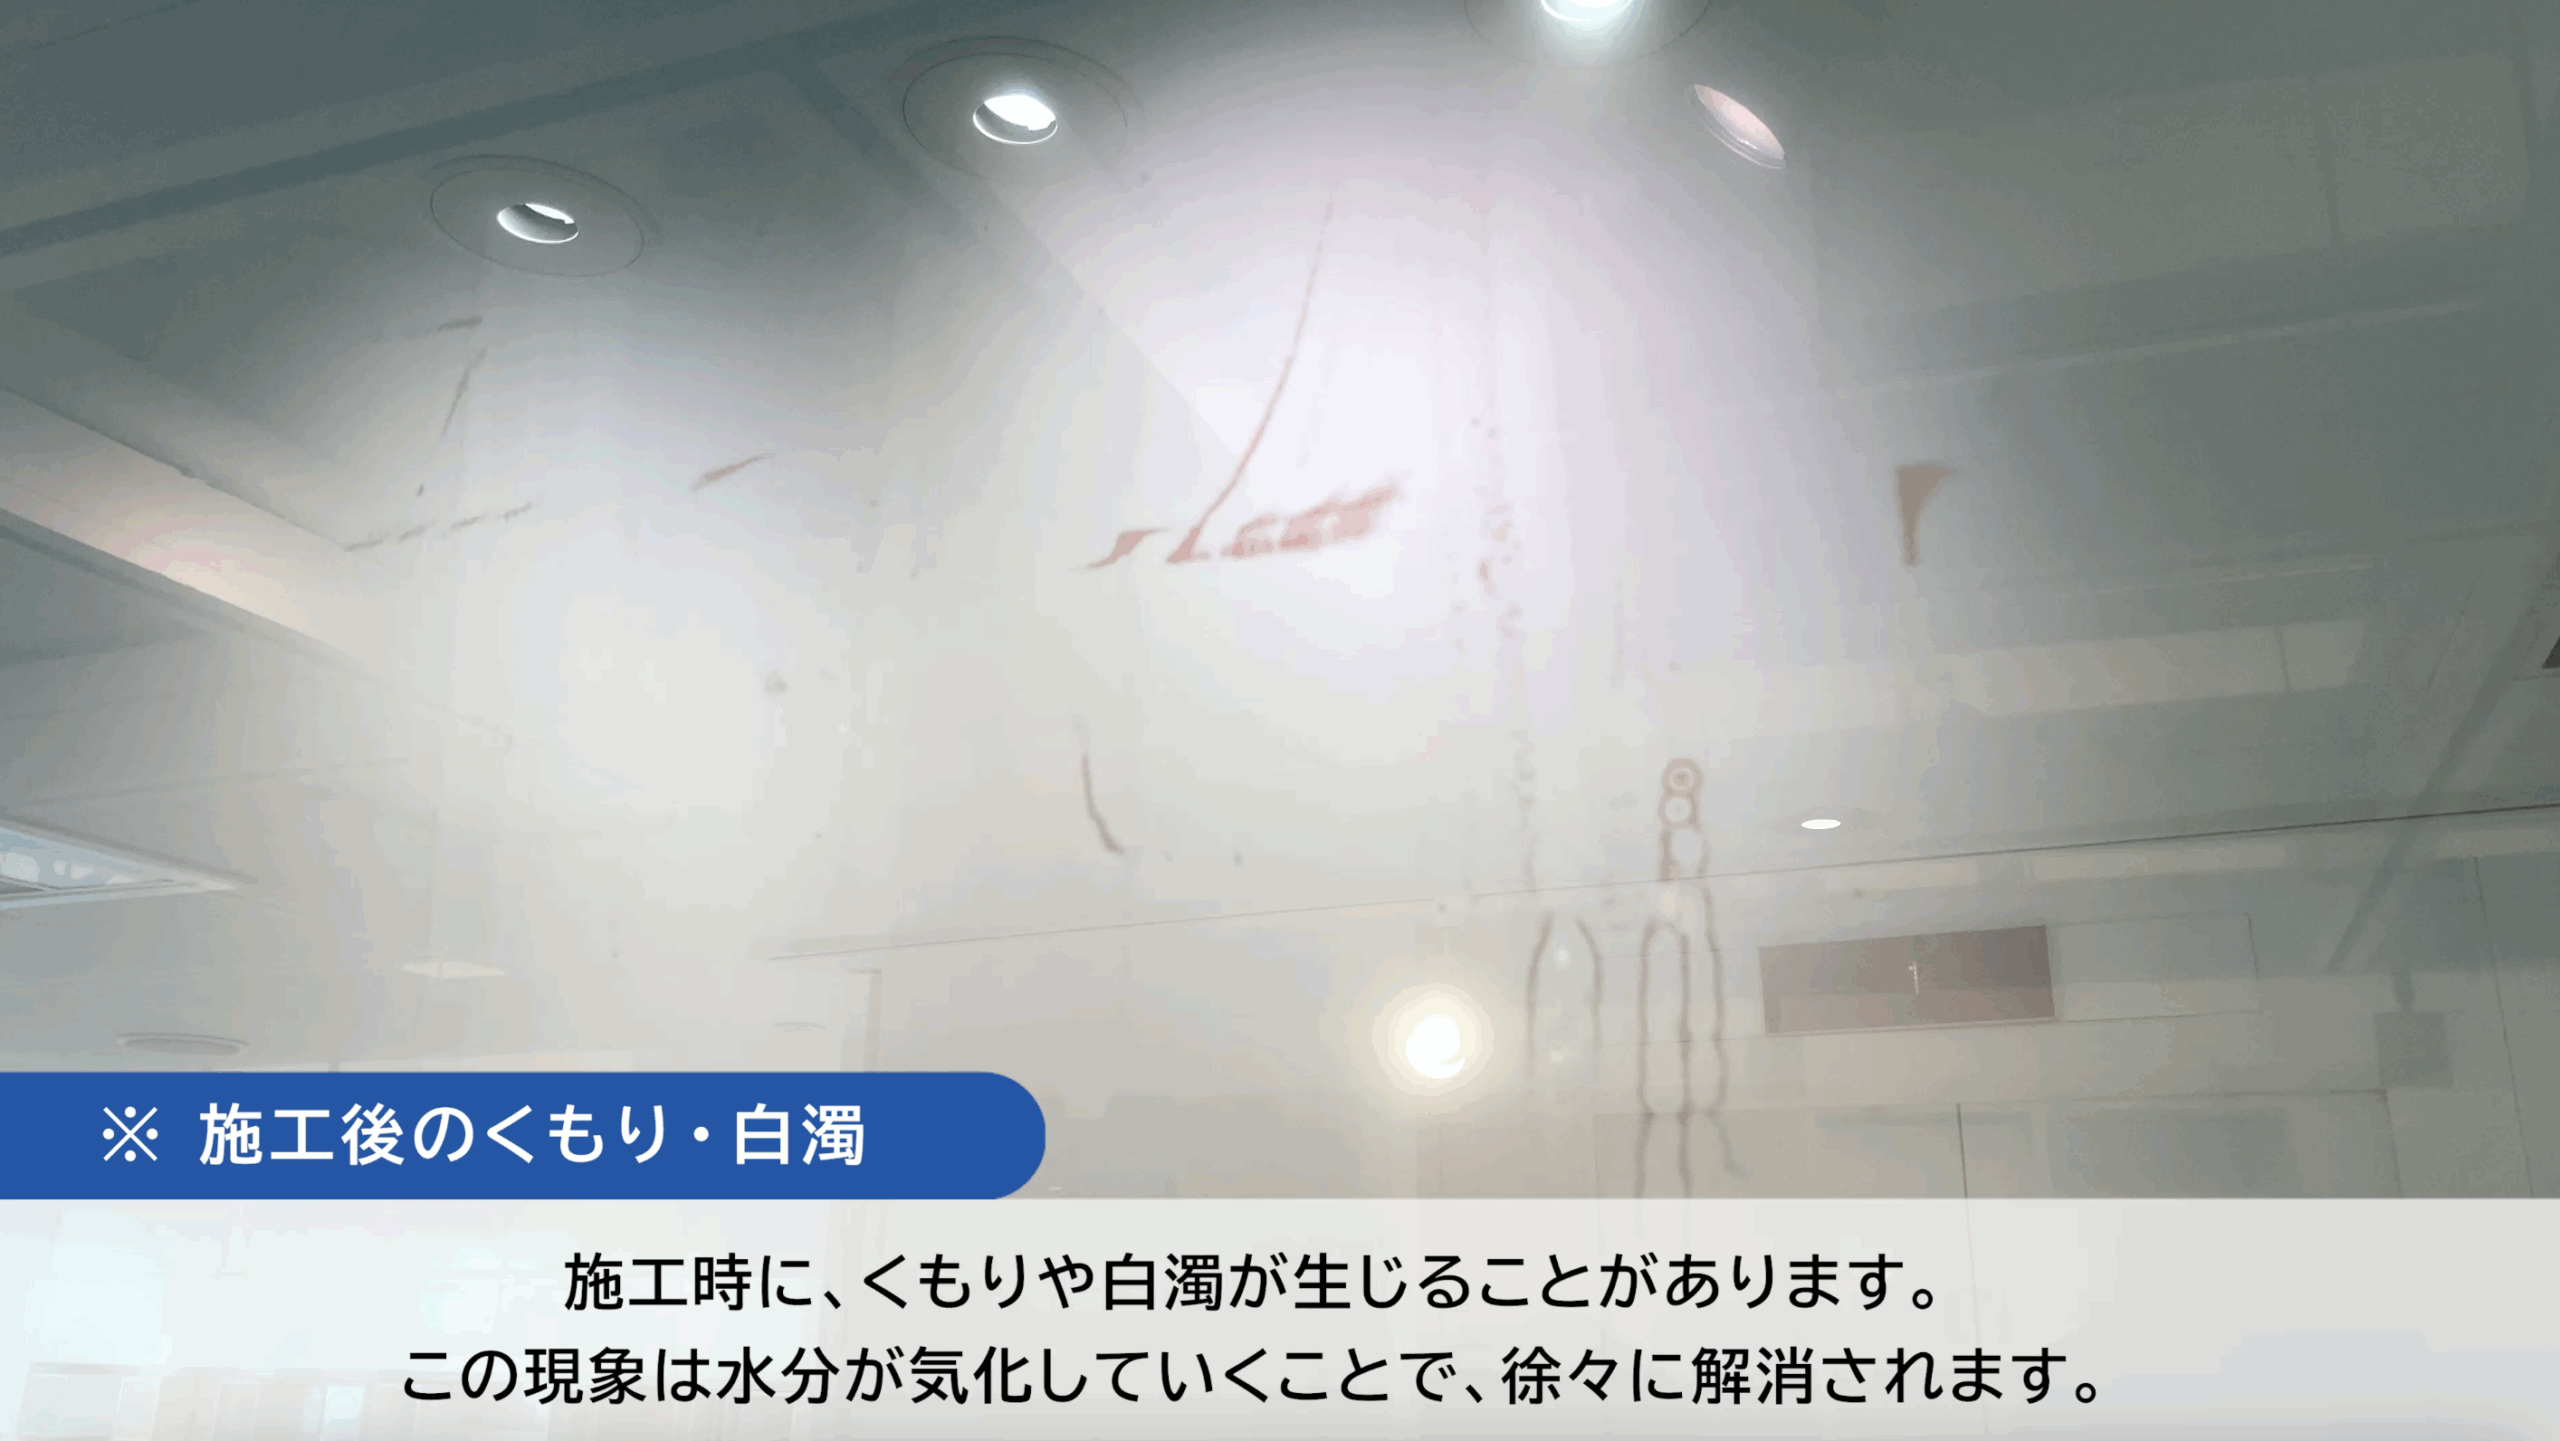
* Notes after installation
- Fogging or cloudiness may appear immediately after installation.
- This will resolve naturally as the moisture evaporates.
* How to fix a lifted protective film
- Peel back the protective film in the lifted area.
- Peel back the film slightly, then smooth it out evenly from the center toward the edges.
- Reapply the protective film and smooth it out evenly in the same manner.
- Using a rubber squeegee, press it down from the center outward, taking care to avoid creating wrinkles.
- Finally, finish the top, bottom, left, and right edges as usual.